nikon d7200 user manual

Welcome to the Nikon D7200 User Manual. This guide helps you master your camera’s features. Access the PDF or use the Nikon Manual Viewer 2 app for easy navigation and understanding of settings.

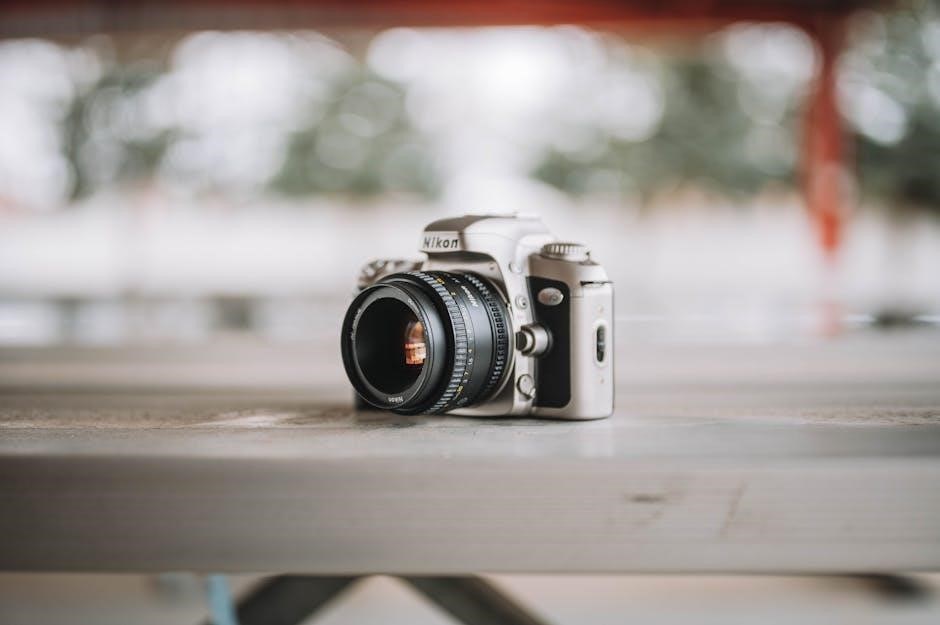
1.1 Overview of the Nikon D7200 Camera

The Nikon D7200 is a high-performance DSLR camera designed for enthusiasts and professionals. It features a 24.2-megapixel DX-format CMOS sensor‚ delivering sharp images with excellent low-light performance. With ISO sensitivity up to 25600‚ 51 autofocus points‚ and 1080p video recording‚ it excels in various photography scenarios. Its robust build‚ intuitive controls‚ and advanced features make it a versatile tool for capturing stunning stills and videos.

1.2 Importance of Reading the User Manual

Reading the Nikon D7200 user manual is essential for maximizing your camera’s potential. It provides detailed explanations of features‚ settings‚ and troubleshooting tips. Understanding the manual ensures you can optimize image quality‚ resolve errors‚ and customize settings to suit your photography style. It’s a valuable resource for both beginners and advanced users‚ helping you unlock the camera’s full capabilities and enhance your overall shooting experience.

How to Access the Nikon D7200 User Manual

Access the Nikon D7200 user manual by downloading the PDF version or using the Nikon Manual Viewer 2 app‚ available for free on the App Store and Google Play.

2.1 Downloading the PDF Version

To download the Nikon D7200 user manual in PDF format‚ visit Nikon’s official website or trusted sources like manualslib.com. The PDF includes detailed setup guides‚ reference manuals‚ and troubleshooting tips. Ensure you have Adobe Acrobat Reader installed for viewing. This format allows offline access and easy navigation‚ providing comprehensive instructions for optimal camera use.

2.2 Using the Nikon Manual Viewer 2 App

The Nikon Manual Viewer 2 app offers a convenient way to access the D7200 user manual. Available for free on the App Store and Google Play‚ it allows you to view the manual offline. The app supports multiple languages and provides an intuitive interface for navigating through camera settings‚ features‚ and troubleshooting guides‚ ensuring easy access to information anytime‚ anywhere.

Key Features of the Nikon D7200

The Nikon D7200 features a 24.2MP DX-format CMOS sensor‚ ISO 100-25600‚ 51-point autofocus‚ 6fps continuous shooting‚ 1080p video recording‚ and built-in Wi-Fi with NFC connectivity for seamless sharing.

3.1 24.2 Megapixel DX-Format CMOS Sensor

The Nikon D7200 is equipped with a 24.2-megapixel DX-format CMOS sensor‚ delivering exceptional image quality with sharp details‚ vibrant colors‚ and excellent low-light performance. This sensor captures high-resolution images‚ ideal for professional photographers and enthusiasts alike. It ensures superior noise reduction‚ enabling clear shots even at high ISO settings‚ making it versatile for various lighting conditions and creative photography needs.

3.2 ISO Sensitivity and Noise Performance

The Nikon D7200 offers an impressive ISO range of 100 to 25600‚ extendable to 102400‚ ensuring excellent low-light performance. Equipped with advanced noise reduction technology‚ the camera delivers clean and detailed images even at high ISO settings. The EXPEED 4 image processor enhances noise management‚ preserving sharpness and color accuracy. This makes it ideal for photographers capturing in challenging lighting conditions while maintaining high-quality results.

3.3 Autofocus System and Metering

The Nikon D7200 features a 51-point autofocus system‚ offering precise subject tracking and fast acquisition. The advanced Multi-CAM 3500 II sensor ensures sharp focus‚ even in low-light conditions. For metering‚ the camera provides 3D color matrix metering II‚ center-weighted‚ and spot modes‚ delivering accurate exposure control. These systems work seamlessly with the EXPEED 4 processor to optimize image quality and performance in various lighting scenarios.

3.4 Video Recording Capabilities

The Nikon D7200 supports full HD video recording at 1080p with frame rates up to 60fps. It offers manual controls for exposure‚ ISO‚ and audio levels‚ ensuring creative flexibility. The camera also features an external microphone jack for enhanced sound quality. Additionally‚ the D7200 supports time-lapse and interval shooting‚ making it versatile for both stills and video enthusiasts;

Getting Started with the Nikon D7200

Unbox and set up your Nikon D7200‚ charge the battery‚ and insert the memory card. Familiarize yourself with basic controls to begin capturing stunning photos and videos effortlessly.

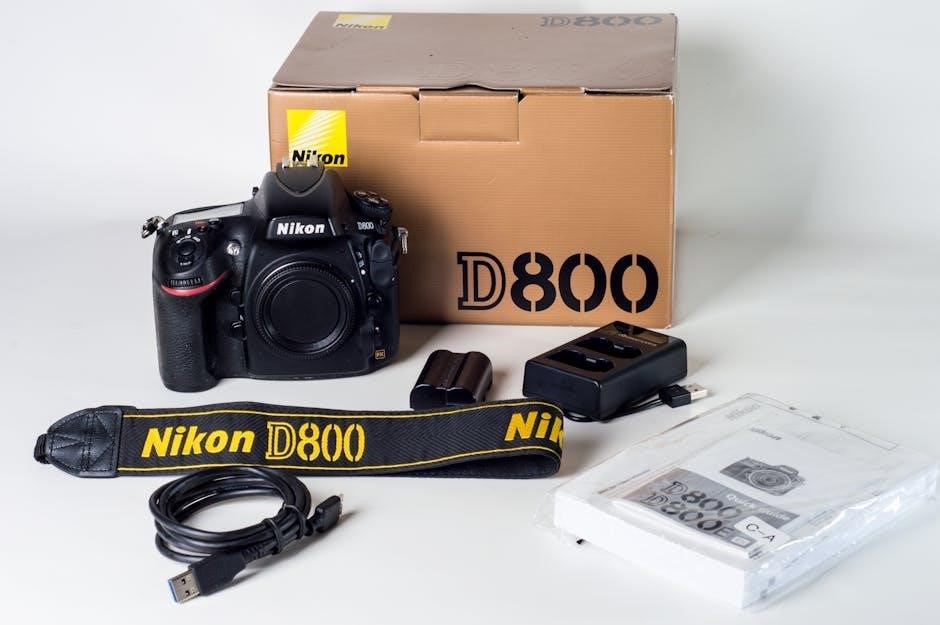
4.1 Unboxing and Initial Setup

When you unbox your Nikon D7200‚ ensure all accessories like the camera body‚ battery‚ charger‚ and straps are included. Inspect the camera for any damage. Before turning it on‚ insert the battery and memory card. Refer to the provided manual or downloaded guide for step-by-step setup instructions. This will help you configure basic settings and prepare the camera for its first use.

4.2 Charging the Battery and Inserting the Memory Card

Charge the Nikon D7200 battery using the provided MH-25a charger until the indicator turns green. Insert the battery into the camera‚ ensuring it clicks securely. Next‚ open the memory card slot on the right side and insert your SD card with the contacts facing the camera. Gently push until it clicks. Ensure the card is compatible and formatted properly for optimal performance. Refer to the manual for detailed instructions.

4.3 Basic Camera Controls and Buttons

Familiarize yourself with the Nikon D7200’s essential controls. The mode dial on top sets shooting modes like Manual‚ Aperture Priority‚ or Auto. The multi-selector on the back navigates menus and adjusts settings. The shutter release is on the right grip‚ with the AF-mode button nearby for focusing options. Use the live view switch to toggle between the LCD and viewfinder. The “i” button accesses quick settings‚ while the playback and delete buttons manage your photos. Mastering these controls enhances your shooting experience.

Navigating the Menu System

The Nikon D7200 menu system offers comprehensive control over camera settings. Use the multi-selector to navigate through options. Customize My Menu for quick access to frequently used features.

5.1 Understanding the Different Menu Options

The Nikon D7200 menu system is divided into several categories‚ including Shooting‚ Setup‚ Retouch‚ and My Menu. Each menu provides access to specific settings for customizing camera behavior. Shooting menus control exposure‚ autofocus‚ and image quality. Setup menus manage general camera preferences like time‚ language‚ and firmware updates. Retouch menus offer in-camera editing tools. My Menu allows users to save frequently used settings for quick access‚ enhancing workflow efficiency.

5.2 Customizing Settings for Personal Preference

The Nikon D7200 allows users to tailor settings to their preferences. Customize buttons‚ assign functions‚ and create shortcuts for streamlined use. Picture Controls enable personal image styling. Save preferred settings as presets for quick access. This customization enhances workflow and ensures the camera adapts to individual shooting styles‚ making it more intuitive and efficient for photographers of all levels.

Advanced Features and Customization

Explore advanced features like Picture Controls for enhanced image styling and custom shooting modes. Tailor settings to refine workflows and optimize camera performance for unique creative needs.

6.1 Using Picture Controls for Image Enhancement

Picture Controls in the Nikon D7200 enable users to customize image settings such as sharpening‚ contrast‚ and saturation. These controls enhance photo quality and are accessible through the camera’s menu. Additional Picture Controls can be downloaded from Nikon’s official website‚ offering expanded creative possibilities. Utilize these options to refine your images and achieve your desired artistic style with precision and ease.

6.2 Setting Up Custom Shooting Modes

Custom shooting modes on the Nikon D7200 allow users to save specific camera settings for quick access. Assign your preferred settings to the ‘U1’ and ‘U2’ positions on the mode dial. This feature is ideal for frequently used configurations‚ such as portrait or landscape settings. Access and manage these modes through the menu system‚ ensuring efficient shooting and tailored results to match your creative vision and workflow needs.

Tips for Optimizing Camera Performance

Regularly update firmware for improved functionality. Clean the sensor and memory cards to prevent errors. Use the Nikon Manual Viewer 2 app for quick setting references. Optimize battery life by disabling unused features and using energy-saving modes. Ensure proper lens maintenance for sharp images. Experiment with Picture Controls for enhanced creativity and consistency in your shots.

7.1 Best Practices for Shooting in Different Modes

Mastering different shooting modes enhances your photography. Use Auto Mode for simplicity and Manual Mode for full control. Adjust ISO settings to optimize for lighting conditions. Experiment with Picture Controls for creative image enhancement. Utilize the autofocus system for sharp captures. Regularly review images on the LCD to ensure quality. Familiarize yourself with metering modes for accurate exposures. Practice using Aperture Priority and Shutter Priority for specific effects. Customize settings to match your creative vision for stunning results.

7.2 Maintaining and Updating Firmware

Regularly check for firmware updates to ensure optimal camera performance. Visit Nikon’s official website or use the Nikon Manual Viewer 2 app to verify the latest version. Always use a fully charged battery during updates. Follow on-screen instructions carefully to avoid interruptions. Updating firmware enhances functionality‚ improves compatibility‚ and fixes potential issues. Stay updated to maximize your Nikon D7200’s capabilities and ensure smooth operation.

Troubleshooting Common Issues

This section helps you identify and resolve common issues with your Nikon D7200. Check error messages‚ camera malfunctions‚ and explore solutions in the manual or online support.

8.1 Resolving Error Messages and Camera Malfunctions

Common issues like error messages or camera malfunctions can often be resolved by resetting the camera or updating firmware. Check the manual or online support for specific solutions. Ensure the battery is fully charged and memory cards are compatible. If problems persist‚ contact Nikon support for professional assistance. Regularly updating firmware and maintaining proper camera care can help prevent malfunctions and ensure optimal performance.

8.2 Resetting the Camera to Factory Settings

Resetting the Nikon D7200 to factory settings restores default configurations‚ resolving persistent issues. Navigate to the Setup Menu‚ select Reset Settings‚ and confirm. Note that this erases custom settings. After resetting‚ update the firmware if necessary. Use the Nikon Manual Viewer 2 app for guidance. Regular resets can help maintain optimal performance and address software-related problems effectively;

Additional Resources and Support

Explore Nikon’s official website‚ forums‚ and the Manual Viewer 2 app for comprehensive support. Access tutorials‚ FAQs‚ and community discussions to enhance your D7200 experience and troubleshooting.

9.1 Online Communities and Forums

Join Nikon’s official forums‚ Reddit‚ and Facebook groups for D7200 users. These platforms offer troubleshooting tips‚ creative ideas‚ and technical discussions. Engage with experts and enthusiasts to enhance your photography skills and resolve issues. Access shared resources‚ tutorials‚ and user-generated content to maximize your camera’s potential and stay updated on the latest techniques and settings for optimal performance.

9.2 Nikon Customer Support and Service Centers

Nikon offers comprehensive customer support through their official website‚ live chat‚ and phone assistance. For repairs‚ visit authorized service centers for professional maintenance. These resources ensure your D7200 operates optimally‚ providing solutions for technical issues and warranty services. Visit Nikon’s support page to locate the nearest center or contact their team for personalized assistance.

Mastering the Nikon D7200 requires understanding its features and settings. This manual guides you through optimization‚ troubleshooting‚ and customization. Experiment and enjoy capturing stunning photos with confidence.

10.1 Summary of Key Takeaways

The Nikon D7200 user manual provides comprehensive guidance on camera operation‚ from initial setup to advanced features. It covers autofocus‚ ISO settings‚ video recording‚ and customization options. Regular firmware updates and proper maintenance ensure optimal performance. Troubleshooting tips and factory reset options help resolve issues. Exploring online resources and Nikon support enhances your photography journey. Experiment with settings to capture stunning images and videos effortlessly.

10.2 Encouragement to Explore and Experiment

Embrace the Nikon D7200’s potential by experimenting with its features. Explore different shooting modes‚ Picture Controls‚ and customization options to refine your photography style. Use the manual as a foundation‚ then venture beyond to discover new creative possibilities. Regularly update firmware and maintain your camera for peak performance. Join online communities for inspiration and troubleshooting. With practice and curiosity‚ unlock your full creative potential and master the D7200.

chrysler 2014 town and country manual

The Chrysler 2014 Town & Country is a versatile minivan known for its reliability, spacious interior, and robust performance. With a powerful 3.6L V6 engine and smooth transmission, it offers a comfortable ride for families. The owner’s manual is essential for understanding its features, maintenance, and troubleshooting, ensuring safe and efficient operation. This section provides an overview of the vehicle and the importance of the manual for optimal ownership experience.

1.1 Overview of the Vehicle

The Chrysler 2014 Town & Country is a minivan designed for family comfort and versatility. It features a 3.6L V6 engine, smooth 6-speed transmission, and front-wheel drive. With seating for up to seven passengers and ample cargo space, it balances practicality and performance. The vehicle also includes sliding doors, foldable seats, and advanced safety features, making it a reliable choice for daily use and long trips alike.

1.2 Importance of the Owner’s Manual

The owner’s manual is a crucial guide for understanding and maintaining the Chrysler 2014 Town & Country. It provides detailed information on vehicle features, maintenance schedules, and troubleshooting tips. By following the manual, owners can ensure optimal performance, safety, and longevity of the vehicle. It also helps in addressing common issues and emergencies, making it an essential resource for responsible and informed ownership;

Key Features of the Chrysler 2014 Town and Country

The Chrysler 2014 Town & Country offers versatility, reliability, and a spacious interior. Its key features include a powerful engine, comfortable seating, and advanced technology for a family-friendly experience.

2.1 Engine and Performance

The Chrysler 2014 Town & Country features a powerful 3.6L V6 Pentastar engine, delivering 283 horsepower and 260 lb-ft of torque. Paired with a smooth 6-speed automatic transmission, it ensures responsive acceleration and efficient performance. The engine is renowned for its reliability and fuel efficiency, making it ideal for both city driving and long road trips while providing a comfortable and quiet ride for all passengers.

2.2 Interior and Exterior Design

The Chrysler 2014 Town & Country features a sleek exterior with sliding side doors and a practical minivan design. Inside, it boasts a spacious cabin with seating for up to seven passengers, offering ample legroom and cargo space. The interior includes premium cloth upholstery, a well-organized dashboard, and versatile Stow ‘n Go seating for enhanced convenience. Exterior styling emphasizes functionality and aerodynamics, ensuring a comfortable and stylish family vehicle.

2.3 Technology and Safety Features

The 2014 Chrysler Town & Country is equipped with advanced technology, including a UConnect infotainment system, Bluetooth connectivity, and a rearview camera. Safety features include a comprehensive airbag system, electronic stability control, and traction control. These features enhance driver confidence and passenger protection, making the vehicle a reliable choice for families. The manual provides detailed instructions for utilizing these technologies effectively.

Maintenance Schedule

Regular maintenance is crucial for the Chrysler 2014 Town & Country’s longevity. The manual outlines specific intervals for oil changes, tire rotations, and fluid checks to ensure optimal performance and reliability.

3.1 Routine Maintenance Requirements

Regular maintenance for the Chrysler 2014 Town & Country includes oil changes every 5,000 to 7,500 miles, tire rotations every 10,000 miles, and annual inspections of belts and hoses. The manual recommends checking fluid levels monthly and replacing the air filter every 15,000 miles. These routine tasks ensure the vehicle runs smoothly and prevent potential issues down the road.

3.2 Recommended Service Intervals

The Chrysler 2014 Town & Country manual outlines specific service intervals to ensure optimal performance. Schedule appointments at 30,000 miles for a thorough inspection, including fluid checks and belt replacements. At 60,000 miles, expect a more detailed service, such as spark plug replacement and a brake system inspection. Regular adherence to these intervals ensures reliability and prevents costly repairs.

Safety Features and Precautions

The Chrysler 2014 Town & Country emphasizes safety with features like multiple airbags, electronic stability control, and traction control. Always follow precautions outlined in the manual to ensure passenger and vehicle safety.

4.1 Airbag System and Safety Belts

The Chrysler 2014 Town & Country is equipped with a comprehensive airbag system, including front, side, and curtain airbags, designed to protect occupants in various collision scenarios. Proper use of safety belts is emphasized in the manual, as they work in conjunction with airbags to maximize protection. Regular inspection of the airbag system is recommended to ensure optimal functionality.

4.2 Electronic Stability Control and Traction Control

The Chrysler 2014 Town & Country features advanced Electronic Stability Control (ESC) and Traction Control systems. These technologies enhance vehicle stability by automatically adjusting engine power and braking to prevent skidding. ESC helps maintain directional control, while Traction Control reduces wheel slippage on uneven surfaces. Both systems are always active but can be manually deactivated for specific driving conditions. The owner’s manual provides detailed guidance on their operation and customization.

Diagnostics and Troubleshooting

The Chrysler 2014 Town & Country manual provides detailed guidance for diagnosing and resolving common issues. Dashboard warning lights and error codes help identify problems. Regular system checks ensure optimal performance and safety. The manual outlines troubleshooting steps for electrical, mechanical, and software-related concerns. Proper diagnostics and timely fixes prevent major repairs and maintain the vehicle’s reliability. Always refer to the manual for accurate solutions.

5.1 Understanding Dashboard Warning Lights

The Chrysler 2014 Town & Country manual explains the meaning of dashboard warning lights, ensuring driver awareness and safety. These lights indicate issues like oil changes, tire pressure, or system malfunctions. Recognizing them helps drivers address problems promptly. The manual provides a detailed guide to interpret each light, distinguishing between critical and routine alerts. Consult the manual for accurate diagnoses to avoid misjudging issues and ensure proper vehicle maintenance.

5.2 Common Issues and Solutions

The Chrysler 2014 Town & Country manual highlights common issues like coolant leaks, faulty sensors, and transmission glitches. Solutions include checking fluid levels, replacing worn parts, and updating software. Regular maintenance, such as oil changes and belt replacements, prevents major repairs. Addressing warning lights promptly ensures safety and extends vehicle lifespan. Refer to the manual for detailed troubleshooting guides tailored to specific problems.

Performance and Fuel Efficiency

The 2014 Chrysler Town & Country features a 3.6L V6 engine, delivering strong power and smooth acceleration. It achieves an estimated 17 mpg city and 25 mpg highway, ensuring efficient performance for both urban and long-distance drives. The six-speed automatic transmission and fuel-saving technology enhance overall efficiency, making it a practical choice for families seeking reliability and economy.

6.1 Fuel Economy Ratings

The 2014 Chrysler Town & Country offers an EPA-estimated 17 mpg in the city and 25 mpg on the highway. Its 3.6L V6 engine and 6-speed automatic transmission optimize fuel efficiency. The minivan’s fuel economy is influenced by its aerodynamic design and advanced engine technology. With a 20-gallon fuel tank, it provides a range of up to 400 miles on a single tank, making it efficient for both city driving and road trips. Proper driving habits can further enhance these ratings.

6.2 Driving Tips for Optimal Performance

To maximize the 2014 Chrysler Town & Country’s performance, maintain steady speeds, avoid sudden accelerations, and use cruise control on highways. Keep tires inflated, as underinflated tires reduce efficiency. Remove unnecessary weight and plan routes to minimize driving time. Regularly check fluid levels and ensure proper wheel alignment. These practices enhance fuel efficiency, reduce wear, and prolong the vehicle’s lifespan, ensuring a smooth and reliable driving experience for years to come.

Customization and Upgrades

Popular upgrades for the 2014 Chrysler Town & Country include interior accessories, performance modifications, and tech enhancements. These upgrades improve functionality, comfort, and overall driving satisfaction for owners.

7.1 Available Accessories

The 2014 Chrysler Town & Country offers a variety of accessories to enhance functionality and style. Popular options include roof racks, cargo organizers, and premium floor mats. Tech enthusiasts can upgrade with aftermarket infotainment systems or wireless charging stations. Exterior enhancements like alloy wheels and protective coatings are also available. These accessories allow owners to tailor their vehicle to meet specific needs and preferences, improving both practicality and aesthetics while maintaining the vehicle’s original performance and safety standards.

7.2 DIY Modifications and Enhancements

Owners can personalize their 2014 Chrysler Town & Country with DIY modifications. Popular upgrades include installing aftermarket infotainment systems, adding LED lighting, or upgrading seats with custom upholstery. Cargo area organizers and storage solutions are practical enhancements. Performance tweaks, such as air filter upgrades, can improve efficiency. Exterior styling modifications, like decals or trim accents, allow owners to add a personal touch while maintaining the vehicle’s functionality and appeal.

Technical Specifications

The 2014 Chrysler Town & Country features a 3.6L V6 engine producing 283 horsepower, paired with a 6-speed automatic transmission. It has a 121.2-inch wheelbase, 202.8-inch length, and 4,652 lbs curb weight, offering a 20-gallon fuel capacity and up to 3,600 lbs towing capacity, making it a reliable and versatile minivan.

8.1 Engine and Transmission Details

The 2014 Chrysler Town & Country is equipped with a 3.6L Pentastar V6 engine, delivering 283 horsepower and 260 lb-ft of torque. Paired with a 6-speed automatic transmission (62TE), it ensures smooth power delivery. The engine features dual overhead cams, 24 valves, and sequential multi-port fuel injection. Regular unleaded fuel is recommended, and the drivetrain is front-wheel drive, providing efficient performance for both city and highway driving conditions.

8.2 Dimensions and Capacities

The 2014 Chrysler Town & Country measures 531 cm in length, 201 cm in width, and 194 cm in height, with a 307 cm wheelbase. It offers a fuel tank capacity of 77 liters, a curb weight of 2,110 kg, and a maximum towing capacity of 1,588 kg. Ground clearance is 16 cm, providing ample space for passengers and cargo, ensuring versatility and practicality for various driving needs and conditions.

Warranty and Service Coverage

The 2014 Chrysler Town & Country comes with a 3-year/36,000-mile basic limited warranty and a 5-year/100,000-mile powertrain warranty. Regular maintenance ensures coverage validity and optimal performance, as outlined in the manual.

9.1 Factory Warranty Details

The 2014 Chrysler Town & Country comes with a 3-year/36,000-mile basic limited warranty and a 5-year/100,000-mile powertrain limited warranty. The basic warranty covers repairs to addresses defects in materials or workmanship, while the powertrain warranty protects essential engine, transmission, and drivetrain components. Both warranties provide peace of mind for owners, ensuring covered repairs are performed at no additional cost. Regular maintenance, as outlined in the manual, is required to maintain warranty validity.

9.2 Extended Service Plans

Extended service plans for the 2014 Chrysler Town & Country offer additional protection beyond the factory warranty. These plans typically cover repairs for up to 7 years or 100,000 miles, including major components like the engine, transmission, and electrical systems. They provide peace of mind for owners seeking long-term protection and can be tailored to individual needs. Reviewing the manual helps owners understand coverage details and benefits, ensuring continued vehicle reliability and performance. Extended plans are a wise investment for maintaining the vehicle’s condition and avoiding unexpected repair costs. Always compare options and select a plan that aligns with your driving habits and expectations for comprehensive coverage. This ensures your Chrysler remains in optimal condition for years to come. Regular maintenance, as outlined in the manual, is essential to uphold the terms of any extended service plan and protect your investment.

Environmental Considerations

The 2014 Chrysler Town & Country adheres to emissions standards, promoting fuel efficiency and eco-friendly driving. The manual guides on responsible disposal and recycling of vehicle components.

10.1 Emissions and Fuel Efficiency Standards

The 2014 Chrysler Town & Country features a 3.6L V6 engine with flex-fuel capability, supporting E85 for reduced emissions. It meets stringent emissions standards, aligning with eco-friendly driving practices. The manual provides insights into optimizing fuel efficiency, achieving EPA-estimated 17 mpg city and 25 mpg highway. Proper maintenance and driving habits, as outlined, help minimize environmental impact while ensuring vehicle longevity.

10.2 Recycling and Disposal Guidelines

Proper recycling and disposal of the Chrysler 2014 Town & Country’s components are crucial for environmental protection. Battery, fluids, and tires must be handled according to local regulations. Consult authorized Chrysler dealers or certified recycling centers for guidance. Ensure hazardous materials are disposed of safely to minimize ecological impact. Chrysler supports sustainable practices, emphasizing responsible end-of-life vehicle management to reduce waste and promote recycling effectively.

The Chrysler 2014 Town & Country is a reliable and versatile vehicle, offering a blend of performance, comfort, and practicality. Proper maintenance and adherence to the manual ensure optimal ownership. For further assistance, consult Chrysler’s official resources or authorized dealers to address any concerns effectively and safely.

11.1 Final Thoughts on Ownership

Owning the Chrysler 2014 Town & Country offers a blend of reliability, comfort, and practicality, making it a great choice for families. Its robust engine and versatile interior ensure a smooth driving experience. Regular maintenance, as outlined in the manual, is key to preserving its performance and longevity. With proper care, this vehicle remains a dependable companion for years of safe and enjoyable travel.

11.2 Resources for Further Assistance

For further assistance, owners can refer to the official Chrysler website, authorized dealerships, or online forums. Additional resources include diagnostic tools, repair guides, and customer support hotlines. These resources provide detailed troubleshooting, maintenance tips, and updates, ensuring optimal vehicle performance and addressing any concerns effectively. Utilizing these tools helps maximize the longevity and efficiency of the Chrysler 2014 Town & Country.

cuisinart 3200 manual

Welcome to the Cuisinart DCC-3200 Manual‚ your guide to understanding and using the PerfecTemp 14-Cup Programmable Coffeemaker. This manual provides essential safety guidelines‚ operating instructions‚ and features to ensure optimal performance and a delightful coffee-making experience.

1.1 Overview of the Cuisinart PerfecTemp 14-Cup Programmable Coffeemaker

The Cuisinart PerfecTemp DCC-3200 is a premium 14-cup programmable coffeemaker designed for coffee enthusiasts seeking convenience and precision. It features a sleek‚ modern design with a stainless steel exterior‚ adjustable brew strength‚ and temperature control for optimal flavor. The coffeemaker includes a thermal carafe to keep coffee warm for hours and a built-in charcoal water filter to ensure pure‚ chlorine-free brewing. With programmable settings‚ users can set brew times in advance‚ while the Auto-On and Auto-Off functions enhance energy efficiency. The device also includes a Ready Tone alert to signal when brewing is complete‚ making it a versatile and user-friendly addition to any kitchen.

1.2 Importance of Reading the Instruction Booklet

Reading the Cuisinart DCC-3200 instruction booklet is crucial for safe and effective use of the coffeemaker. It provides essential safety guidelines‚ such as avoiding exposure to hot surfaces and proper handling of electrical components. The manual also explains how to optimize the machine’s performance‚ customize brew settings‚ and troubleshoot common issues. By following the instructions‚ users can prevent potential hazards and ensure longevity of the product. Additionally‚ the booklet outlines warranty details and maintenance tips‚ helping users maintain their coffeemaker and enjoy a perfect coffee experience every time. Taking the time to read the manual ensures you get the most out of your investment while staying safe and informed.

Safety Precautions

Always follow safety guidelines to avoid hazards. Keep the coffeemaker away from water‚ hot surfaces‚ and children. Never use damaged cords or place the appliance near open flames.

2.1 Important Safety Guidelines for Electrical Appliances

When using the Cuisinart DCC-3200‚ always follow essential electrical safety guidelines to prevent accidents. Keep the coffeemaker away from water and avoid using it near hot surfaces or open flames. Never submerge the appliance in water or expose it to excessive moisture. Ensure the power cord is not damaged and avoid overloading electrical outlets. Keep children away from the appliance while it is in operation. Do not use the coffeemaker outdoors or in humid environments. Always unplug the unit when not in use or before cleaning. These precautions will help ensure safe and reliable performance of your Cuisinart DCC-3200.

2.2 Do’s and Don’ts for Safe Usage

To ensure safe and efficient use of the Cuisinart DCC-3200‚ follow these essential guidelines:
– DO read the instruction booklet carefully before first use.
– DO place the coffeemaker on a stable‚ heat-resistant surface.
– DO use only Cuisinart-recommended filters and accessories.
– DO clean the appliance regularly to prevent mineral buildup.
– DO unplug the coffeemaker before cleaning or maintaining it.
– DON’T modify the appliance or use unauthorized parts.
– DON’T operate the coffeemaker with a damaged cord or plug.
– DON’T place the coffeemaker near open flames or hot surfaces.
– DON’T submerge the electrical base in water.
By adhering to these guidelines‚ you can enjoy safe and trouble-free brewing with your Cuisinart DCC-3200.

Product Features and Specifications

The Cuisinart DCC-3200 features a 14-cup glass carafe‚ programmable 24-hour timer‚ adjustable brew strength‚ and Ready Tone. Its stainless steel design ensures durability and modern style.

3.1 Key Features of the Cuisinart DCC-3200

The Cuisinart DCC-3200 is a 14-cup programmable coffeemaker designed for convenience and performance. It features adjustable brew strength‚ allowing users to customize their coffee’s flavor intensity. The machine includes a built-in programmable timer‚ enabling users to set a brew time up to 24 hours in advance. Its PerfecTemp technology ensures optimal brewing temperature for a perfect cup every time. Additionally‚ the coffeemaker includes a charcoal water filter to remove impurities and a gold-tone filter for hassle-free brewing. The Ready Tone feature alerts users when brewing is complete‚ and the auto-on/off function enhances energy efficiency. With its sleek stainless steel design‚ this coffeemaker combines durability and modern style for any kitchen.

3.2 Technical Specifications of the Coffeemaker

The Cuisinart DCC-3200 is a 14-cup programmable coffeemaker with a stainless steel construction. It measures 10.5 x 9.5 x 14.5 inches and weighs approximately 9.5 pounds. The coffeemaker operates at 120V‚ 60Hz‚ with a power rating of 1300 watts. It features a built-in programmable timer‚ adjustable brew strength settings‚ and a 1-4 cup setting for smaller batches. The machine includes a glass carafe‚ a gold-tone filter‚ and a charcoal water filter. The water reservoir capacity is 14 cups‚ and the coffeemaker supports both paper and reusable filters. These specifications ensure versatile‚ efficient‚ and high-quality coffee brewing for home use.

Programming and Brewing Settings

The Cuisinart DCC-3200 allows users to program brewing times‚ set the clock‚ and customize brew strength and temperature. Features include a programmable timer‚ 1-4 cup setting‚ and Auto-On functionality for convenient coffee preparation;

4.1 How to Set the Clock and Auto-On Time

To set the clock on the Cuisinart DCC-3200‚ press the Clock button and use the arrow keys to adjust the time in 12-hour format‚ selecting AM or PM. Press Clock again to save. For Auto-On‚ press the Auto-On button‚ use the arrow keys to set your desired brew time‚ and press Auto-On to confirm. The machine will now brew coffee automatically at the set time‚ ensuring a fresh start every morning. The display will show both the current and Auto-On times‚ and a confirmation beep will signal successful settings.

4.2 Adjusting the Auto-Off Time for Energy Efficiency

The Cuisinart DCC-3200 allows you to adjust the Auto-Off time to conserve energy. Press the Auto-Off button and use the arrow keys to select the desired shut-off time (0-4 hours). Press the Auto-Off button again to save your setting. The default Auto-Off time is 2 hours‚ but you can customize it to suit your needs. This feature ensures the coffeemaker turns off automatically after the last brew‚ reducing standby power consumption. Adjusting this setting helps optimize energy efficiency while maintaining convenience. Always refer to the manual for precise instructions on navigating the menu and saving your preferences.

4.3 Customizing Brew Strength and Temperature

The Cuisinart DCC-3200 allows you to tailor your coffee experience by adjusting brew strength and temperature. Use the Strong Brew button to select from regular or bold settings. For temperature control‚ press the Temperature Control button and use the arrow keys to choose between 140°F‚ 150°F‚ or 160°F. The machine remembers your last settings for convenience. Adjusting these features ensures your coffee is brewed to your exact preferences. Refer to the manual for detailed instructions on navigating the menu and saving your custom settings. This customization enhances flavor and satisfaction‚ making every cup perfect for your taste.

Maintenance and Cleaning

Regularly clean the coffeemaker and carafe with mild soap and water. Descale every 3-6 months using a vinegar solution to remove mineral buildup and ensure optimal performance. Always rinse thoroughly after cleaning to prevent any residual taste. Refer to the manual for specific instructions on descaling and maintenance procedures to keep your Cuisinart DCC-3200 functioning at its best. Proper care extends the lifespan and maintains the quality of your coffee. Cleaning the machine regularly prevents bacteria growth and keeps your coffee tasting fresh. Follow the manual’s guidelines for a hassle-free maintenance routine. Regular maintenance ensures consistent brewing results and prevents potential issues. Cleaning the brew basket and carafe after each use helps maintain hygiene and flavor. Descaling is crucial to remove hard water deposits that can affect the machine’s efficiency. Use the recommended cleaning solutions or white vinegar for descaling. Always unplug the machine before cleaning to ensure safety. Wipe down the exterior with a damp cloth to keep it looking new. Cleaning the water reservoir regularly prevents mold and bacteria growth. Replace the water filter as instructed to maintain water quality. Proper maintenance ensures your coffeemaker continues to deliver delicious coffee for years to come. Regular cleaning and descaling are essential for maintaining the performance and longevity of your Cuisinart DCC-3200. Follow the manual’s step-by-step cleaning and maintenance instructions to keep your machine in top condition. Cleaning the machine regularly prevents clogs and ensures smooth operation. Descaling helps maintain the machine’s heating element and water flow. Proper maintenance ensures your coffeemaker continues to function efficiently and brew perfect coffee every time. Regular cleaning and descaling are vital for maintaining the quality and performance of your Cuisinart DCC-3200. Follow the manual’s guidelines to keep your machine clean and in excellent working order. Cleaning and maintenance are simple processes that ensure your coffeemaker continues to deliver great-tasting coffee. Regularly cleaning and descaling your Cuisinart DCC-3200 prevents mineral buildup and bacterial growth‚ ensuring optimal performance and flavor. Always refer to the manual for detailed cleaning and maintenance instructions. Proper care and maintenance extend the lifespan of your coffeemaker and ensure consistent brewing results. Cleaning and descaling are essential steps to maintain the quality and functionality of your Cuisinart DCC-3200. Follow the manual’s recommendations to keep your machine in top shape. Regular maintenance ensures your coffeemaker continues to brew delicious coffee with ease. Cleaning and descaling are crucial for maintaining the performance and longevity of your Cuisinart DCC-3200. Refer to the manual for step-by-step instructions on how to clean and maintain your machine. Proper care ensures your coffeemaker remains in great condition and continues to deliver perfect coffee every time. Cleaning and maintenance are simple yet important tasks to keep your Cuisinart DCC-3200 functioning optimally. Follow the manual’s guidelines to ensure your machine stays clean and efficient. Regular cleaning and descaling prevent issues and ensure your coffeemaker continues to perform at its best. Cleaning and maintenance are essential for the longevity and performance of your Cuisinart DCC-3200. Always follow the manual’s instructions to keep your machine in excellent condition. Proper care ensures your coffeemaker continues to brew great-tasting coffee for years to come. Cleaning and descaling are vital for maintaining the quality and functionality of your Cuisinart DCC-3200. Refer to the manual for detailed instructions on how to clean and maintain your machine. Regular maintenance ensures your coffeemaker remains in top condition and continues to deliver perfect coffee every time. Cleaning and descaling are important steps to maintain the performance and longevity of your Cuisinart DCC-3200. Follow the manual’s guidelines to keep your machine clean and functioning well. Proper care ensures your coffeemaker continues to brew delicious coffee with ease. Cleaning and maintenance are essential for the optimal performance and longevity of your Cuisinart DCC-3200. Always refer to the manual for step-by-step cleaning and descaling instructions. Regular cleaning and descaling prevent mineral buildup and bacterial growth‚ ensuring your coffeemaker continues to function efficiently. Follow the manual’s recommendations to maintain your machine’s performance and extend its lifespan. Cleaning and maintenance are simple yet crucial tasks to keep your Cuisinart DCC-3200 in great condition. Refer to the manual for detailed instructions on how to clean and descale your machine. Proper care ensures your coffeemaker continues to deliver perfect coffee every time. Cleaning and descaling are essential for maintaining the quality and functionality of your Cuisinart DCC-3200. Follow the manual’s guidelines to keep your machine clean and efficient. Regular maintenance ensures your coffeemaker remains in excellent condition and continues to brew delicious coffee for years to come. Cleaning and maintenance are vital for the longevity and performance of your Cuisinart DCC-3200. Always follow the manual’s instructions to keep your machine in top shape. Proper care ensures your coffeemaker continues to deliver great-tasting coffee every time. Cleaning and descaling are important steps to maintain the performance and longevity of your Cuisinart DCC-3200. Refer to the manual for detailed cleaning and maintenance instructions. Regular cleaning and descaling prevent issues and ensure your coffeemaker functions optimally. Cleaning and maintenance are essential for the optimal performance and longevity of your Cuisinart DCC-3200. Follow the manual’s guidelines to keep your machine clean and efficient. Proper care ensures your coffeemaker continues to brew perfect coffee every time. Cleaning and descaling are crucial for maintaining the quality and functionality of your Cuisinart DCC-3200. Always refer to the manual for step-by-step instructions on how to clean and maintain your machine. Regular maintenance ensures your coffeemaker remains in great condition and continues to deliver delicious coffee for years to come. Cleaning and maintenance are simple yet important tasks to keep your Cuisinart DCC-3200 functioning at its best. Follow the manual’s recommendations to ensure your machine stays clean and efficient. Proper care ensures your coffeemaker continues to brew great-tasting coffee with ease. Cleaning and descaling are vital for maintaining the performance and longevity of your Cuisinart DCC-3200. Refer to the manual for detailed instructions on how to clean and descale your machine. Regular maintenance ensures your coffeemaker remains in top condition and continues to deliver perfect coffee every time. Cleaning and maintenance are essential for the optimal performance and longevity of your Cuisinart DCC-3200. Always follow the manual’s guidelines to keep your machine clean and functioning well. Proper care ensures your coffeemaker continues to brew delicious coffee for years to come. Cleaning and descaling are important steps to maintain the quality and functionality of your Cuisinart DCC-3200. Follow the manual’s instructions for detailed cleaning and maintenance procedures. Regular cleaning and descaling prevent mineral buildup and bacterial growth‚ ensuring your coffeemaker continues to perform efficiently. Cleaning and maintenance are crucial for the longevity and performance of your Cuisinart DCC-3200. Refer to the manual for step-by-step instructions on how to clean and maintain your machine. Proper care ensures your coffeemaker remains in excellent condition and continues to deliver perfect coffee every time. Cleaning and descaling are essential for maintaining the quality and functionality of your Cuisinart DCC-3200. Follow the manual’s guidelines to keep your machine clean and efficient. Regular maintenance ensures your coffeemaker continues to function optimally and brew great-tasting coffee for years to come. Cleaning and maintenance are simple yet important tasks to keep your Cuisinart DCC-3200 in top condition. Always refer to the manual for detailed instructions on how to clean and descale your machine. Proper care ensures your coffeemaker continues to deliver delicious coffee every time. Cleaning and descaling are vital for maintaining the performance and longevity of your Cuisinart DCC-3200. Follow the manual’s recommendations to keep your machine clean and functioning well. Regular maintenance ensures your coffeemaker remains in excellent condition and continues to brew perfect coffee for years to come. Cleaning and maintenance are essential for the optimal performance and longevity of your Cuisinart DCC-3200. Refer to the manual for detailed cleaning and descaling instructions. Proper care ensures your coffeemaker continues to deliver great-tasting coffee every time. Cleaning and descaling are important steps to maintain the quality and functionality of your Cuisinart DCC

Additional Resources

5.1 Cleaning the Coffeemaker and Carafe

Regular cleaning is essential to maintain the performance and hygiene of your Cuisinart DCC-3200. Start by unplugging the coffeemaker before cleaning. Use mild soap and warm water to wipe down the exterior and clean the carafe. For the brew basket and grinds container‚ wash with soap and water after each use. The carafe and lid can be cleaned in the dishwasher or manually with a soft sponge. Descaling every 3-6 months using a vinegar solution helps remove mineral buildup. Mix equal parts water and white vinegar in the reservoir‚ run a brewing cycle‚ and rinse thoroughly. Cleaning the machine regularly prevents bacteria growth and ensures fresh-tasting coffee. Always rinse all parts thoroughly to remove any cleaning solution residue before reuse. Proper cleaning extends the lifespan of your coffeemaker and maintains its efficiency. For detailed steps‚ refer to the manual.

2013 chrysler 200 owners manual

The 2013 Chrysler 200 Owners Manual is a comprehensive guide to understanding and maintaining your vehicle. It includes essential information on safety, features, and proper usage. Available online as a PDF, it ensures easy access to troubleshooting and maintenance tips.

Purpose of the Manual

The purpose of the 2013 Chrysler 200 Owners Manual is to provide owners with a comprehensive guide to understanding and maintaining their vehicle. This manual is designed to help drivers operate their car safely and efficiently, covering essential information about features, controls, and maintenance. It includes details on safety precautions, vehicle inspection, and troubleshooting common issues. The manual also outlines proper usage of advanced features, ensuring optimal performance and longevity of the vehicle. By following the guidelines provided, owners can maximize their driving experience while adhering to manufacturer recommendations. The manual is intended to be a go-to resource for any questions or concerns about the 2013 Chrysler 200, making it an indispensable tool for both new and experienced drivers. Its clear and concise instructions ensure that all aspects of vehicle ownership are covered.

What’s New in the 2013 Model

The 2013 Chrysler 200 introduced several updates and improvements, enhancing both performance and comfort. It featured a refined 2.4-liter four-cylinder engine, offering improved fuel efficiency and smoother acceleration. The interior received upgrades, including a redesigned dashboard and improved materials for a more premium feel. The infotainment system was also enhanced, providing better connectivity options and user-friendly controls. Exterior styling updates included new trim levels and wheel designs, giving the vehicle a fresh, modern appearance. Additionally, the 2013 model emphasized safety with advanced features such as electronic stability control and improved airbag systems. These updates made the 2013 Chrysler 200 a more appealing choice for drivers seeking a balance of style, comfort, and reliability. The owners manual reflects these changes, ensuring drivers can fully utilize the vehicle’s capabilities.

Maintenance and Servicing

The 2013 Chrysler 200 Owners Manual emphasizes regular maintenance to ensure optimal performance and longevity. It outlines recommended schedules for oil changes, tire rotations, and inspections.

Maintenance Schedule

The 2013 Chrysler 200 Owners Manual provides a detailed maintenance schedule to ensure your vehicle runs efficiently. It recommends regular oil changes every 5,000 to 7,500 miles, depending on driving conditions. Tire rotations should occur every 6,000 to 8,000 miles to maintain even tread wear. Brake pads, belts, and fluids should be inspected and replaced as specified. The manual also outlines schedules for air filter replacements, spark plug changes, and other essential services. Following this schedule helps prevent mechanical issues, improves fuel efficiency, and extends the lifespan of your vehicle. Additionally, the manual includes guidelines for severe driving conditions, such as frequent city driving or extreme temperatures, which may require more frequent maintenance. Adhering to this schedule ensures your Chrysler 200 performs optimally and remains reliable for years to come.

Routine Maintenance Services

Routine maintenance services for the 2013 Chrysler 200 are essential to ensure optimal performance and longevity. The owners manual recommends regular oil changes, typically every 5,000 to 7,500 miles, depending on driving conditions. Tire rotations should be performed every 6,000 to 8,000 miles to ensure even tread wear. Fluid checks, including engine oil, coolant, and transmission fluid, should be done at each service interval. Air filters should be replaced every 15,000 to 30,000 miles, while spark plugs are recommended to be replaced at 100,000 miles. Brake pads and rotors should be inspected every 12,000 miles or as needed. Proper maintenance also includes inspecting belts and hoses for signs of wear. Following these routines helps prevent mechanical issues, improves fuel efficiency, and ensures your Chrysler 200 runs smoothly for years to come.

Resetting the Maintenance Indicator

Resetting the maintenance indicator on your 2013 Chrysler 200 is a straightforward process outlined in the owners manual. Start by turning the ignition switch to the “ON” position without starting the engine. Use the steering wheel-mounted controls to navigate to the “VEHICLE INFO” menu on the instrument cluster. Scroll to “RESET MAINTENANCE INDICATOR” and press the “SELECT” button. Confirm the reset by selecting “RESET” when prompted. The system will clear the maintenance light, indicating the process is complete. This procedure ensures your vehicle’s maintenance tracking is accurate and up-to-date. Always refer to the manual for detailed instructions or if issues arise during the reset process.

Safety Features

The 2013 Chrysler 200 is equipped with advanced safety features, including multiple airbags, seat belts, and child restraint systems. Anti-theft systems enhance vehicle security.

Seat Belts and Airbags

The 2013 Chrysler 200 is equipped with a comprehensive suite of safety features, including advanced seat belts and airbags. The vehicle features front airbags, side airbags, and curtain airbags designed to provide protection in various collision scenarios. Seat belts are equipped with pretensioners to ensure proper restraint during sudden stops or impacts. The manual emphasizes the importance of wearing seat belts at all times and outlines proper usage guidelines. Additionally, the airbag system includes sensors to detect the severity of a collision and deploy accordingly. The manual also provides instructions on how to inspect and maintain these safety features to ensure optimal performance. By adhering to the guidelines in the manual, drivers and passengers can maximize their safety while on the road.

Child Restraints

The 2013 Chrysler 200 Owners Manual provides detailed guidance on the proper installation and use of child restraints. The vehicle is equipped with LATCH (Lower Anchors and Tethers for Children) anchors in the rear seats, simplifying the process of securing child seats. The manual outlines the steps for installing rear-facing, forward-facing, and booster seats, ensuring they are properly secured. It also emphasizes the importance of placing children in the rear seat for optimal safety. Additionally, the manual provides weight and height guidelines for each type of restraint to ensure correct usage. Parents are advised to follow the manufacturer’s instructions for their specific child seat and to regularly inspect the installation for safety. The manual also includes tips for adjusting the vehicle’s seat belts to accommodate child restraints effectively.

Anti-Theft Systems

The 2013 Chrysler 200 Owners Manual details the advanced anti-theft systems designed to protect your vehicle. The Sentry Key® theft deterrent system is integrated to prevent unauthorized use, utilizing an electronic immobilizer that disables the engine unless a valid key is present. The system is equipped with a transponder chip in the key fob, which communicates with the vehicle’s computer to verify authenticity. Additionally, the manual explains how to arm and disarm the optional alarm system, which includes features like intrusion alerts and door/hood ajar warnings. The system automatically arms after a short delay and sounds the horn if unauthorized entry is detected. Proper use of these features ensures enhanced security and peace of mind for vehicle owners.

Technical Specifications

The 2013 Chrysler 200 features a 2.4-liter four-cylinder engine, delivering efficient performance and smooth handling. It is paired with a six-speed automatic transmission, ensuring optimal fuel efficiency and responsive driving.

Engine and Performance

The 2013 Chrysler 200 is equipped with a 2.4-liter four-cylinder engine, producing 173 horsepower and 166 lb-ft of torque. This engine offers a balance of power and fuel efficiency, making it suitable for daily driving. For enhanced performance, an optional 3.6-liter V6 engine is available, delivering 283 horsepower and 260 lb-ft of torque. Both engines are paired with a six-speed automatic transmission, ensuring smooth gear shifts and responsive acceleration. The vehicle also features dual variable valve timing and an electronic throttle control, which optimize engine performance and efficiency. With its robust engine options and advanced technology, the 2013 Chrysler 200 provides a satisfying driving experience while maintaining competitive fuel economy ratings, making it a reliable choice for both city and highway driving.

Transmission and Fuel Economy

The 2013 Chrysler 200 features a six-speed automatic transmission, designed for smooth shifting and optimal performance. The standard 2.4-liter engine achieves an estimated EPA rating of 21 MPG in the city and 29 MPG on the highway, providing efficient fuel economy for daily commutes. For those seeking more power, the optional 3.6-liter V6 engine, while delivering higher performance, offers slightly lower fuel efficiency at 19 MPG city and 29 MPG highway. Both configurations ensure a balance between power and economy, catering to diverse driving needs. The vehicle also includes a fuel-saving feature that deactivates cylinders under light load conditions, further enhancing efficiency. With a generous 16.9-gallon fuel tank capacity, the Chrysler 200 offers extended driving range, making it a practical choice for both urban and long-distance travel.

Suspension and Brakes

The 2013 Chrysler 200 is equipped with a robust suspension system designed for a smooth and responsive ride. It features a front independent suspension with coil-over-shock absorbers and a rear multi-link setup, ensuring stability and comfort. The braking system includes power-assisted ventilated front disc brakes and solid rear disc brakes, providing reliable stopping power. Anti-lock braking (ABS) is standard, enhancing control during hard braking. The electronic stability control works in tandem with the suspension and brakes to maintain traction and stability, especially in challenging driving conditions. These features contribute to a safe and composed driving experience, making the 2013 Chrysler 200 a dependable choice for everyday driving.

Additional Resources

The 2013 Chrysler 200 Owners Manual can be downloaded free online in PDF format. Additional resources include Chrysler’s official website, community forums, and FAQ sections for further assistance.

Downloading the Manual Online

The 2013 Chrysler 200 Owners Manual is readily available for download online in PDF format. You can access it through Chrysler’s official website or reputable third-party platforms. The manual spans 517 pages and includes detailed information on vehicle operation, maintenance, and safety features. Downloading the manual ensures you have instant access to troubleshooting guides, maintenance schedules, and warranty details. It’s also eco-friendly and convenient for referencing on your computer or mobile device. Additionally, the manual is free to download, making it an invaluable resource for owners seeking to understand and care for their vehicle properly. This digital version is searchable and easily navigable, ensuring you can find the information you need quickly and efficiently.

Chrysler’s Official Support

Chrysler provides dedicated support for the 2013 Chrysler 200 through its official website and customer service channels. Owners can access the 2013 Chrysler 200 Owners Manual directly from the Chrysler website, ensuring authenticity and accuracy. The manual is available in PDF format and covers essential information on vehicle operation, maintenance, and safety features. Additionally, Chrysler offers online resources, including FAQs and troubleshooting guides, to assist owners with any questions or concerns. The official support also includes warranty details and service recommendations, helping owners maintain their vehicle according to factory standards. This comprehensive support ensures that drivers can maximize their vehicle’s performance and longevity while staying informed about proper care and maintenance practices.

Community Forums and FAQs

Community forums and FAQs are invaluable resources for 2013 Chrysler 200 owners seeking advice, troubleshooting tips, and shared experiences. These platforms allow owners to connect with other drivers, exchange ideas, and find solutions to common issues. Many forums are dedicated to Chrysler vehicles, offering detailed discussions on maintenance, modifications, and repairs. FAQs sections, often hosted on Chrysler’s official website or enthusiast sites, provide quick answers to frequently asked questions about the 2013 Chrysler 200. Topics range from understanding technical specifications to resolving common problems. These resources empower owners to make informed decisions and address concerns without relying solely on official support. By engaging with these communities, drivers can gain insights and tips to enhance their ownership experience.

kenmore elite clothes dryer manual

Welcome to the Kenmore Elite Clothes Dryer Manual! This guide provides essential instructions for setting up, operating, and maintaining your dryer. Discover how to optimize performance, troubleshoot issues, and ensure safety. Refer to your model number for specific details and resources.

Overview of the Kenmore Elite Clothes Dryer

The Kenmore Elite Clothes Dryer is a high-performance appliance designed for efficient and reliable drying. With a large capacity drum, it handles bulky loads effortlessly. Advanced drying technology ensures even heat distribution, preventing damage to fabrics. Multiple cycles cater to various fabric types, from delicate items to heavy-duty work clothes. Energy-efficient settings reduce power consumption, while safety features like automatic shut-off enhance user protection. Its durable construction and user-friendly interface make it an excellent choice for modern households seeking convenience and efficiency in their laundry routine.

Importance of the Manual for Proper Usage

The Kenmore Elite Clothes Dryer manual is crucial for safe and effective operation. It provides detailed instructions for installation, maintenance, and troubleshooting. By following the manual, users can optimize drying performance, prevent damage to clothes, and ensure energy efficiency. It also outlines safety precautions to avoid accidents. The manual includes model-specific guidance, warranty information, and repair tips. Regularly consulting it helps extend the appliance’s lifespan and maintains its efficiency. Refer to your model number for tailored instructions and resources to get the most out of your Kenmore Elite Clothes Dryer.

Key Features of the Kenmore Elite Clothes Dryer

The Kenmore Elite Clothes Dryer boasts advanced drying technology, multiple cycles, energy efficiency, and a large capacity drum. Its smart design ensures optimal performance and convenience.

Advanced Drying Technology

The Kenmore Elite Clothes Dryer features cutting-edge advanced drying technology designed to ensure efficient and gentle fabric care. With sensors that monitor moisture levels and temperature, it automatically adjusts settings to prevent overheating and damage. This technology ensures clothes dry evenly and quickly, reducing wrinkles and extending fabric life. The dryer also includes smart diagnostics that detect issues early, ensuring optimal performance. These innovations make the Kenmore Elite a reliable choice for modern households seeking high-quality laundry solutions.

Multiple Drying Cycles and Options

The Kenmore Elite Clothes Dryer offers a wide range of drying cycles and customizable options to meet various fabric needs. From delicate fabrics to heavy-duty items, the dryer provides tailored settings for optimal results. Users can choose between cycles like Normal, Delicate, Heavy Duty, and Eco Mode for energy efficiency. Additional features include customizable temperature controls, moisture-sensing technology, and a quiet operation setting. These options ensure precise drying for all fabric types, making the Kenmore Elite a versatile and user-friendly appliance for modern laundry demands.

Energy Efficiency and Safety Features

The Kenmore Elite Clothes Dryer is designed with energy efficiency and safety in mind. It features advanced moisture-sensing technology to prevent over-drying, saving energy and extending fabric life. The dryer is equipped with automatic shut-off, which stops the cycle once clothes are dry. Additionally, it includes a child safety lock to prevent accidental operation. Energy Star certification ensures it meets energy-saving standards, reducing utility bills. These features make the Kenmore Elite a reliable, eco-friendly, and safe choice for household laundry needs.

Installation and Setup Guidelines

Ensure proper installation for safe operation. Verify model number and location. Connect electrical and venting systems securely. Level the dryer to avoid vibrations and ensure efficiency. Follow manual guidelines carefully for optimal performance.

Pre-Installation Requirements

Before installing your Kenmore Elite Clothes Dryer, ensure the location meets safety and technical standards. Verify the model number and serial number for accurate setup. Check the product record for purchase details and specifications. Ensure the area is well-ventilated and clear of flammable materials. Confirm the electrical supply matches the dryer’s requirements, typically 240V for electric models. Plan the venting system according to the manual to avoid obstructions. Level the floor to prevent vibrations. Follow all safety guidelines to ensure proper installation and optimal performance. Consult the manual for specific pre-installation checks.

Step-by-Step Installation Instructions

To install your Kenmore Elite Clothes Dryer, begin by positioning it in a well-ventilated area, ensuring it is level and secure. Next, connect the electrical supply, ensuring compatibility with the dryer’s voltage requirements. For gas models, attach the gas line securely and test for leaks. Install the venting system according to the manual, ensuring proper airflow. Connect the vent hose to both the dryer and the exterior vent. Double-check all connections for tightness and safety. Finally, test the dryer by running a cycle to ensure it operates smoothly and efficiently. Follow all safety guidelines provided in the manual.

Connecting Electrical and Venting Systems

Connect the Kenmore Elite Clothes Dryer to a dedicated 240-volt electrical outlet, ensuring compatibility with the dryer’s specifications. For gas models, securely attach the gas line and test for leaks using a soap solution. Install a rigid metal venting system, avoiding flexible plastic hoses, and ensure all connections are tight. The vent should lead to the exterior of your home to prevent moisture buildup. Consult local codes for compliance and consider hiring a licensed professional for complex setups. Always follow the manual for specific electrical and venting requirements to ensure safety and efficiency.

Operating the Kenmore Elite Clothes Dryer

Start by selecting the appropriate drying cycle and options for your load. Use the control panel to set temperature and timing. Begin operation and monitor progress.

Understanding the Control Panel

The Kenmore Elite Clothes Dryer features a user-friendly control panel with intuitive buttons and a digital display. Familiarize yourself with the buttons for cycle selection, temperature control, and start/stop functions. The display shows the selected settings and progress of the drying cycle. Use the buttons to navigate through options and customize your drying experience. Always review your settings before starting to ensure optimal results. This panel is designed to make operation straightforward and efficient.

Selecting the Right Drying Cycle

The Kenmore Elite Clothes Dryer offers multiple drying cycles to suit various fabric types and drying needs. Choose from options like Delicate, Normal, Heavy Duty, and more. Each cycle is designed to handle specific materials, ensuring optimal drying without damage. Use the control panel to select the cycle that matches your load’s requirements. For energy efficiency, consider the Eco Mode for lighter loads. Always check the care labels on your clothes to ensure the best results. Selecting the right cycle enhances drying performance and protects your fabrics.

Loading and Unloading Clothes

Properly loading and unloading your Kenmore Elite Clothes Dryer ensures efficient drying and prevents damage to your clothes. Start by sorting clothes by fabric type and weight. Do not overload the dryer, as this can reduce airflow and drying performance. Place items like towels separately from delicate fabrics. When unloading, remove clothes immediately to avoid wrinkles and static cling; Check pockets for loose items and ensure all clothes are dry. Cleaning the lint filter after each use is also essential for maintaining efficiency and safety. Follow these steps for optimal results.

Maintenance and Care Tips

Regular maintenance ensures your Kenmore Elite Clothes Dryer performs optimally. Clean the lint filter after each use and inspect venting systems for blockages. Schedule professional maintenance annually to check internal components. Proper care extends the dryer’s lifespan and ensures safe operation. Follow these tips for reliable performance and energy efficiency.

Cleaning the Lint Filter

Regularly cleaning the lint filter is crucial for optimal performance and safety. After each use, remove the filter and scrape off accumulated lint using a soft brush or your hands. For stubborn residue, vacuum the filter gently. Ensure it is completely dry before reinstalling. Neglecting this step can reduce airflow, causing longer drying times and potential fire hazards. Clean the filter after every cycle to maintain efficiency and prevent damage to your Kenmore Elite Clothes Dryer. Always refer to your model-specific manual for detailed instructions.

Regularly Inspecting and Cleaning Venting Systems

Regular inspection and cleaning of the venting system are essential for maintaining your Kenmore Elite Clothes Dryer’s performance and safety. Check for blockages, such as lint buildup or debris, which can restrict airflow and increase fire risks. Use a vacuum cleaner or vent brush to remove obstructions. Ensure all venting components, including the exterior vent, are free from damage or kinks. Clean the system every 3-6 months or after heavy use. Proper ventilation ensures efficient drying, reduces energy consumption, and prevents potential hazards. Always follow the manual’s guidelines for your specific model.

Scheduling Professional Maintenance

Regular professional maintenance ensures your Kenmore Elite Clothes Dryer operates efficiently and safely. Schedule annual inspections by certified technicians to identify and address potential issues before they escalate. This service can prevent breakdowns, improve performance, and extend the appliance’s lifespan. For complex repairs or diagnostics, refer to your dryer’s manual for guidance on locating authorized service providers. Visit Sears Parts Direct or Kenmore’s official website for professional support tailored to your specific model. Professional maintenance is crucial for optimal functionality and longevity.

Troubleshooting Common Issues

Diagnose and resolve common problems with your Kenmore Elite dryer, such as noise, vibration, or heating issues, using the manual’s detailed troubleshooting guide.

Diagnosing Noises or Vibrations

Strange noises or vibrations in your Kenmore Elite dryer may indicate loose objects, uneven installation, or worn parts. Check for foreign items like coins in the drum. Ensure the dryer is level and installed on a stable surface. Inspect the drum and rollers for wear. Refer to the manual for specific troubleshooting steps, such as checking the belt or idler pulley. Clean the lint filter and venting system to maintain proper airflow. If issues persist, consult the error codes or contact professional support. Always follow safety guidelines when diagnosing or repairing your dryer.

Addressing Heating Issues

If your Kenmore Elite dryer isn’t heating properly, check the power supply and circuit breaker. Ensure the dryer is set to a heat cycle, as some modes are air-only. Clean the lint filter and venting system to maintain proper airflow. A clogged vent can cause overheating or reduced heat. Inspect the heating element and thermostat for damage. If the issue persists, consult the manual or contact a professional. Always unplug the dryer before attempting repairs to ensure safety. Regular maintenance can prevent heating problems and extend the dryer’s lifespan. Refer to the troubleshooting section for detailed guidance.

Resolving Error Codes

If your Kenmore Elite dryer displays an error code, refer to the manual for specific troubleshooting steps. Common codes like E1 or E2 often indicate issues with temperature sensors or heating elements. E3 may suggest a communication error between the control board and other components. Ensure all connections are secure and clean. For persistent issues, reset the dryer by unplugging it for 30 minutes. If the problem remains, contact Kenmore support or a certified technician. Always reference your model-specific manual for accurate diagnostics and solutions. Regular maintenance can help prevent error codes from occurring.

Frequently Asked Questions (FAQs)

This section addresses common inquiries about the Kenmore Elite Clothes Dryer, including general usage, troubleshooting, and warranty information. How do I find my model number? It’s usually located inside the door or on the back of the dryer. Why is my dryer not heating? Check the power supply, venting, and lint filter. Can I dry delicate fabrics? Use the low-heat setting for sensitive materials.

General Usage and Safety

For safe and efficient operation, always follow the guidelines outlined in the Kenmore Elite Clothes Dryer Manual. Ensure the dryer is installed and vented properly to prevent fire hazards. Regularly clean the lint filter after each use to maintain airflow and reduce risk of overheating. Do not overload the dryer, as this can damage clothes or the machine. Use the appropriate drying cycle for fabric types to prevent damage. Keep the dryer out of reach of children and pets. Always unplug the dryer during maintenance or repairs. Consult the manual for specific safety precautions and usage tips tailored to your model.

Troubleshooting and Repair

If your Kenmore Elite Clothes Dryer isn’t functioning properly, start by identifying the issue. Common problems include unusual noises, overheating, or the dryer not turning on. Check the power supply and ensure the dryer is properly plugged in. For noise issues, inspect the drum for loose objects or uneven installation. If the dryer isn’t heating, verify the venting system is clear and unobstructed. Refer to the manual for error code diagnostics and reset instructions. For complex repairs, consult a professional or contact Kenmore support. Regular maintenance can prevent many common issues.

Warranty and Support Information

Your Kenmore Elite Clothes Dryer is backed by a comprehensive warranty program. Register your product to activate coverage and access exclusive support services. The warranty typically covers parts and labor for defects in materials and workmanship. For assistance, visit the Kenmore website or contact their customer service team. Sears Parts Direct also offers genuine replacement parts and repair resources. Refer to your manual for detailed warranty terms and conditions. Keep your model and serial number handy for efficient support inquiries.

carrier infinity thermostat owner’s manual

The Carrier Infinity Thermostat is a cutting-edge, programmable smart thermostat designed to integrate seamlessly with the Carrier Infinity System, offering advanced temperature control, smart home compatibility, and energy efficiency.

1.1 Overview of the Carrier Infinity System

The Carrier Infinity System is a comprehensive home comfort solution, centered around the Infinity Touch Control, a wall-mounted thermostat that integrates advanced temperature management, humidity control, and smart home connectivity. Designed for seamless operation, the system automatically switches between heating and cooling modes to maintain optimal comfort. With Wi-Fi-enabled models, users can control settings remotely, ensuring energy efficiency and personalized comfort. The system’s compatibility with various Carrier products ensures a unified approach to home climate control, enhancing performance and convenience.

1.2 Importance of the Owner’s Manual

The owner’s manual is a critical resource for understanding and maximizing the capabilities of the Carrier Infinity Thermostat. It provides detailed instructions for installation, setup, and operation, ensuring users can navigate advanced features like programming, smart home integration, and energy-saving settings. The manual also includes troubleshooting guides and maintenance tips to optimize performance. By referencing the manual, users can avoid common issues and ensure their system operates efficiently, making it an indispensable tool for both initial setup and long-term use.

Installation and Setup

The Carrier Infinity Thermostat installation involves mounting the control and connecting it to your HVAC system. Professional assistance is recommended for wiring and setup, ensuring compatibility and optimal performance.

2.1 Physical Installation of the Infinity Control

The Infinity Control must be installed by a qualified technician to ensure proper functionality. Mount the control on an interior wall at eye level, avoiding direct sunlight and drafts. Use the provided mounting hardware for secure installation. Connect the control to your HVAC system, ensuring all wires are correctly linked to their respective terminals. After installation, power on the system and follow the on-screen prompts to initialize the control. Proper installation is crucial for optimal performance and system compatibility.

2.2 Initial Configuration and Setup

After installation, power on the Infinity Control and follow the on-screen instructions to initialize the system. Set the date, time, and desired temperature. Configure humidity and fan settings if applicable. Select the system mode (heating, cooling, or auto) based on your needs. Advanced settings, such as vacation mode or energy-saving options, can be accessed through the menu. Refer to the owner’s manual for detailed guidance on customizing your settings to optimize comfort and energy efficiency. Proper setup ensures seamless operation and compatibility with your HVAC system.

Programming the Thermostat

Program the Infinity Thermostat to customize temperature settings for different times of the day, optimizing comfort and energy efficiency. Use the touch screen to schedule preferences, adjust humidity, and enable features like vacation mode or geofencing for smart operation. Refer to the owner’s manual for step-by-step guidance on advanced programming options and energy-saving configurations.

3.1 Basic Programming Features

The Carrier Infinity Thermostat offers essential programming features like scheduling temperature settings for weekdays and weekends, adjusting humidity levels, and setting vacation mode. These features allow users to customize their comfort preferences easily. The thermostat’s touch screen simplifies the process of setting up a daily schedule, ensuring energy efficiency while maintaining desired indoor conditions. By programming these basic settings, homeowners can optimize their heating and cooling system’s performance without compromising comfort. This ensures a seamless and energy-conscious operation tailored to their lifestyle needs.

3.2 Advanced Programming Options

The Carrier Infinity Thermostat includes advanced features such as occupancy sensing, which adjusts settings based on whether someone is home, and geofencing, which uses your location to optimize heating and cooling. Adaptive recovery ensures the system reaches your desired temperature by the scheduled time. Additionally, the thermostat offers customizable fan settings and humidity control, providing enhanced comfort and energy savings. These features allow for tailored automation, making it easier to manage your home’s environment efficiently and effectively. This level of customization ensures optimal performance and comfort year-round.

Features and Functions

The Carrier Infinity Thermostat offers a sleek, user-friendly interface with advanced features like Wi-Fi connectivity, smart home integration, and energy-saving modes to enhance comfort and efficiency.

4.1 Touch Screen Interface and Navigation

The Carrier Infinity Thermostat features an intuitive touch screen interface designed for easy navigation. Users can adjust settings, view system status, and access advanced features with a few taps. The responsive display ensures smooth interaction, while the menu-driven system simplifies complex operations. Brightness adjustments and customizable shortcuts enhance user convenience, making it accessible for both tech-savvy individuals and those less familiar with smart devices. This interface is central to the thermostat’s functionality, providing a seamless user experience.

4.2 Smart Home Integration and Wi-Fi Connectivity

The Carrier Infinity Thermostat supports seamless smart home integration, enabling control through compatible systems like Apple HomeKit and Amazon Alexa. Wi-Fi connectivity allows remote access via the Carrier app, letting users adjust settings, monitor energy use, and receive system alerts from anywhere. Automatic software updates ensure the thermostat stays current with the latest features. This connectivity enhances convenience, energy efficiency, and overall system performance, making it a versatile addition to modern smart homes.

Maintenance and Troubleshooting

Regular maintenance ensures optimal performance. Clean the touchscreen gently, check for software updates, and restart the system if issues arise. Refer to the manual for detailed troubleshooting guides.

5.1 Routine Maintenance Tasks

Regular maintenance is essential for optimal performance. Clean the touchscreen gently with a soft cloth to avoid smudging. Check for software updates periodically to ensure the latest features. Inspect the thermostat’s wiring and connections for any damage or wear. Replace batteries if applicable, and ensure proper ventilation around the unit. Schedule annual professional HVAC system maintenance to maintain efficiency and performance. Refer to the manual for detailed instructions on these tasks to ensure longevity and reliability of the Carrier Infinity Thermostat.

5.2 Common Issues and Solutions

Common issues with the Carrier Infinity Thermostat include a blank display, connectivity problems, or inaccurate temperature readings. For a blank screen, restart the system or check the circuit breaker. Connectivity issues may require resetting the Wi-Fi connection or ensuring the thermostat is properly linked to your home network. If temperature readings are off, calibrate the sensor or ensure proper installation. Refer to the manual for troubleshooting steps or contact a Carrier dealer for professional assistance to resolve these issues effectively.

The Role of the Infinity Control in the Carrier Infinity System

The Infinity Control serves as the central command center for the Carrier Infinity System, enabling seamless management of heating, cooling, and humidity levels for optimal home comfort.

6.1 System Components and Compatibility

The Infinity Control is compatible with various Carrier system components, including furnaces, heat pumps, and air conditioners. It seamlessly integrates with indoor and outdoor equipment, ensuring optimal performance. The system supports advanced features like Wi-Fi connectivity and smart home integration, allowing users to control their environment remotely. Compatibility extends to multiple stages of heating and cooling, enhancing energy efficiency and comfort. Proper installation ensures all components work together harmoniously, delivering precise temperature control and improved air quality throughout the home.

6.2 Energy Efficiency and Performance

The Carrier Infinity Thermostat excels in energy efficiency, optimizing heating and cooling by learning your home’s needs and preferences. It integrates seamlessly with the Infinity System to minimize energy waste, ensuring precise temperature control and maximizing comfort. Advanced features like smart setbacks and geofencing further enhance efficiency by adjusting settings based on occupancy and location.

With ENERGY STAR certification, the thermostat promotes eco-friendly operation while maintaining superior performance. It also provides detailed energy usage reports, helping you identify ways to reduce consumption and lower utility bills, making it a reliable choice for both comfort and sustainability.

The Carrier Infinity Thermostat offers unparalleled ease of use, smart integration, and energy efficiency, making it a top choice for modern home comfort and convenience.

7.1 Summary of Key Features

The Carrier Infinity Thermostat stands out with its user-friendly touch screen interface, Wi-Fi connectivity for smart home integration, and advanced programming options. It offers energy-saving features like occupancy sensing and geofencing, ensuring optimal performance. Compatible with the entire Carrier Infinity System, this thermostat provides precise temperature control and humidity management. Its sleek design and intuitive navigation enhance the user experience, making it a versatile and efficient solution for modern home comfort needs while maintaining energy efficiency.

7.2 Final Tips for Optimal Use

For optimal performance, regularly update your Carrier Infinity Thermostat software and ensure proper placement away from direct sunlight or drafts. Maintain the touch screen by cleaning it gently and check sensor accuracy. Schedule seasonal adjustments to align with changing weather conditions, and utilize smart features like geofencing and occupancy sensing. Always refer to the owner’s manual for troubleshooting and advanced settings. By following these tips, you can maximize energy efficiency, comfort, and system longevity, ensuring your home remains perfectly balanced year-round.

dragon raising manual

Dragon raising is a unique and rewarding endeavor‚ requiring dedication and knowledge. A comprehensive manual‚ like the Care and Feeding guide‚ offers essential insights for both novices and experienced keepers. It blends practical care tips with deeper wisdom‚ ensuring a harmonious and enriching experience for both humans and dragons. Whether you’re starting your journey or refining your skills‚ this manual serves as a foundation for understanding the art of raising these majestic creatures.

Understanding the Basics of Dragon Care

Mastering the fundamentals of dragon care is crucial for their well-being. This includes understanding their species-specific needs‚ proper habitat setup‚ and dietary requirements. Safety precautions‚ regular maintenance‚ and observation skills are also essential. A thorough manual provides clear guidelines to ensure owners can meet these needs effectively‚ fostering a healthy and thriving relationship with their dragon.

Importance of a Comprehensive Raising Manual

A detailed dragon raising manual is crucial for ensuring the well-being and proper development of your dragon. It provides consistent guidance‚ helping you navigate challenges and make informed decisions. From feeding strategies to habitat design‚ a comprehensive manual offers practical advice and expert insights‚ saving time and reducing risks. It serves as an indispensable resource for both novice and experienced dragon keepers‚ promoting a thriving and harmonious relationship with your dragon.

Dragon Housing and Environment

Creating a safe and comfortable habitat for your dragon is essential. Ensure ample space‚ proper temperature control‚ and safety measures to meet their environmental needs effectively.

Creating a Safe and Comfortable Habitat

A dragon’s habitat must prioritize safety and comfort. Use durable‚ fire-resistant materials for walls and flooring. Ensure proper ventilation to maintain air quality and prevent smoke buildup. The enclosure should be spacious‚ allowing room for movement and growth. Incorporate natural elements like rocks or plants to mimic their wild environment. Climate control is crucial‚ with adjustable temperature zones to suit your dragon’s needs. Personalize the space to reflect your dragon’s preferences for a harmonious living environment.

Essential Accessories for Dragon Enclosures

Equipping your dragon’s habitat with the right accessories is crucial. Heat sources‚ such as heat lamps or ceramic heat emitters‚ maintain optimal temperatures. UVB lighting promotes calcium metabolism‚ preventing health issues. A substrate like sand or reptile carpet ensures comfort and ease of cleaning. Hiding places‚ such as plants‚ rocks‚ or caves‚ reduce stress. Water and feeding bowls should be sturdy to prevent tipping. Climbing structures encourage physical activity and mental stimulation.

Diet and Nutrition for Dragons

A balanced diet is crucial for dragon health. Optimal feeding strategies include varied protein sources and essential vitamins. Avoid harmful foods to ensure proper growth and vitality.

Optimal Feeding Strategies for Growth

A well-balanced diet is crucial for a dragon’s growth. High-protein foods like meats and fish should be prioritized‚ while fruits and vegetables provide essential nutrients. Freshness is key to maintaining health‚ and portion control prevents overfeeding. A feeding schedule tailored to age and size ensures steady development. Consulting experienced keepers can refine these strategies further.

Supplements and Treats for Dragon Health

Supplements and treats play a crucial role in maintaining dragon health. Essential vitamins and minerals‚ such as calcium for scales and wings‚ are vital. Protein-rich treats like specially formulated feeds support muscle growth. Avoid human snacks‚ as they can be harmful. Always introduce new supplements gradually and consult a veterinarian to ensure a balanced diet. This approach ensures optimal well-being and longevity for your dragon.

Dragon Health and Hygiene

Regular veterinary check-ups and proper hygiene practices are crucial for maintaining a dragon’s well-being. Monitor for signs of illness and ensure a clean‚ safe environment to prevent health issues.

Common Health Issues and Prevention

Dragons often face issues like scale infections‚ respiratory problems‚ and wing injuries. Regular grooming‚ a clean habitat‚ and a balanced diet can prevent many ailments. Monitoring for unusual behavior or physical signs‚ like discoloration or lethargy‚ is crucial for early detection. Proper hygiene practices and routine check-ups ensure long-term health and well-being for your dragon.

  • Scale infections: Clean habitat and grooming prevent bacterial growth.
  • Respiratory issues: Ensure good ventilation and avoid exposure to harmful fumes.
  • Wing injuries: Provide safe spaces for flight and exercise.

Best Practices for Dragon Grooming

Regular grooming sessions are crucial for maintaining your dragon’s health and hygiene. Use a soft-bristle brush to remove loose scales and debris‚ while being gentle to avoid stressing your dragon. Trim nails carefully to prevent overgrowth‚ and clean scales regularly to ensure proper shine and health. Daily inspections can help detect injuries or parasites early‚ promoting overall well-being and strengthening your bond with your dragon.

Dragon Behavior and Training

Understanding dragon temperament is crucial for effective training. Recognizing body language cues and using positive reinforcement can foster trust and obedience‚ strengthening the bond between you and your dragon.

Understanding Dragon Temperament and Body Language

Recognizing a dragon’s temperament and body language is crucial for effective communication. Dragons exhibit unique postures‚ tail movements‚ and eye contact to convey emotions. A relaxed dragon may display open wings and a gentle hum‚ while aggression is marked by puffed scales and sharp hisses. Understanding these cues helps in building trust and ensuring harmonious interaction during training and daily care.

Effective Training Techniques for Dragons

Training dragons requires patience‚ consistency‚ and positive reinforcement. Establishing trust through playful interactions and clear commands is essential. Techniques like reward-based training‚ using treats or praise‚ encourage desired behaviors. Setting boundaries while maintaining a gentle approach fosters discipline without causing stress. Gradual exposure to new tasks ensures steady progress‚ helping dragons adapt and thrive under your guidance.

Dragon Socialization and Interaction

Positive interaction fosters trust and understanding between dragons and their keepers. Regular engagement enhances bonding‚ promoting a harmonious relationship built on mutual respect and clear communication.

Importance of Socializing Your Dragon

Socializing your dragon is crucial for its emotional and behavioral development. Dragons that interact with humans and other creatures become more confident and calm in diverse situations. Positive social experiences reduce aggression and fearfulness‚ fostering a stronger bond between you and your dragon. Early exposure to new environments and interactions ensures your dragon grows into a well-adjusted companion.

Building a Strong Bond with Your Dragon

Building a strong bond with your dragon requires trust‚ respect‚ and patience. Spend quality time through consistent‚ positive interactions‚ understanding their needs and body language. Engage in activities that foster mutual enjoyment and teamwork‚ reinforcing your connection. Be present‚ attentive‚ and empathetic‚ ensuring your dragon feels valued and secure. Positive reinforcement and clear boundaries strengthen this lifelong relationship.

Dragon Exercise and Play

Physical Activity Needs for Dragons

Dragons require regular exercise to maintain strength and agility. Activities like flying drills and interactive games ensure physical health and mental stimulation‚ fostering a balanced development.

Dragons require regular exercise to maintain strength and agility. Daily flights‚ terrain exploration‚ and interactive play are essential for their physical and mental well-being. A stimulating environment with space to roam and engage in natural behaviors ensures dragons stay healthy and active. Providing varied activities prevents boredom and stress‚ fostering a balanced and thriving creature.

  • Aim for at least 2-3 hours of activity daily.
  • Incorporate flying‚ climbing‚ and ground exploration.
  • Use toys or puzzles to challenge and engage dragons mentally.

Engaging Play Activities for Mental Stimulation

Dragons thrive on mental and physical challenges. Activities like obstacle courses‚ puzzle toys‚ and scent games keep their minds sharp. Interactive play‚ such as fetch with twists or problem-solving exercises‚ fosters curiosity and bonding. These activities not only entertain but also strengthen cognitive abilities‚ ensuring your dragon remains intellectually stimulated and engaged throughout their life.

Dragon Safety and Security

Ensuring safety around dragons involves understanding their behavior and strength. Secure enclosures prevent accidental harm‚ while protective gear safeguards handlers. Regular monitoring and threat assessments are crucial for both dragon and human well-being.

Ensuring Safety Around Dragons

Ensuring safety around dragons requires careful preparation and awareness. Understand dragon behavior to anticipate potential reactions. Use protective gear like gloves and eyewear. Maintain a safe distance during feeding or handling. Establish clear boundaries to avoid accidental harm. Keep emergency supplies nearby‚ such as fire extinguishers and first aid kits. Always consult a reliable manual for specific guidance on handling your dragon safely.

Protecting Your Dragon from Potential Threats

Ensuring your dragon’s safety involves securing its environment and monitoring potential hazards. Regularly inspect enclosures for vulnerabilities and use protective charms to ward off magical threats. Keep dragons away from toxic substances and predators. Stay informed about local regulations and potential dangers in your area to create a secure and stable living space for your dragon.

Dragon Breeding and Genetics

Genetics play a vital role in dragon breeding‚ ensuring diverse traits and healthy offspring. Understanding inheritance patterns and genetic diversity is crucial for successful breeding programs and responsible practices.

Basics of Dragon Breeding

Dragon breeding begins with understanding genetic fundamentals and selecting compatible pairs. Environmental factors‚ such as nesting conditions and incubation temperatures‚ play a crucial role. Experts emphasize the importance of genetic diversity to ensure healthy offspring. Proper research and planning are essential to avoid complications and promote successful hatching. This foundation is vital for responsible dragon breeding practices.

Genetic Considerations for Healthy Offspring

When breeding dragons‚ genetic diversity is crucial to ensure healthy offspring. Selecting dragons with complementary traits can enhance desirable characteristics while minimizing inherited flaws. Understanding lineage and genetic markers helps predict offspring traits. Proper planning and research are essential to avoid inbreeding issues and promote robust‚ resilient dragons. A well-thought breeding strategy ensures the next generation thrives.

Dragon Legal and Ethical Considerations

Understanding legal requirements for dragon ownership is crucial. Ensure proper permits and licenses are obtained. Ethical practices prioritize dragon welfare and environmental impact. Responsible ownership is essential.

Legal Requirements for Dragon Ownership

Owning a dragon requires adherence to specific legal regulations. These include obtaining a special permit‚ ensuring compliance with safety standards‚ and purchasing liability insurance. Additionally‚ owners must adhere to local ordinances regarding fire safety and noise control. Failure to meet these requirements can result in fines or confiscation of the dragon. Legal compliance is essential for responsible ownership.

Ethical Practices in Dragon Raising

Ethical dragon raising emphasizes respect for these creatures’ autonomy and welfare. The Care and Feeding manual highlights the importance of prioritizing dragons’ well-being over human convenience. Legal requirements ensure responsible ownership‚ preventing exploitation. Ethical practices promote transparency and accountability‚ ensuring dragons are treated with dignity and their unique qualities are preserved for future generations.

Dragon Case Studies and Success Stories

Real-life examples highlight successful dragon-raising journeys‚ showcasing dedication and innovation. Experienced keepers share insights‚ proving that patience and understanding lead to thriving‚ harmonious relationships with these magnificent creatures.

Real-Life Examples of Successful Dragon Raising

A notable example is the journey of a keeper who successfully raised a pink and gold dragon‚ the size of a large dog‚ using insights from the Care and Feeding manual. By blending practical care with a deep understanding of the dragon’s nature‚ the keeper fostered a strong bond‚ showcasing the rewards of dedicated and informed dragon raising. This story highlights the importance of tailored approaches and patience in nurturing these majestic creatures.

Lessons Learned from Experienced Dragon Keepers

Experienced dragon keepers emphasize patience‚ consistency‚ and adaptability. They highlight the importance of understanding dragon behavior and building trust. Many stress the value of continuous learning‚ as each dragon is unique. Seasoned keepers also share tips on creating enriching environments and balancing discipline with affection. Their insights provide a roadmap for fostering a strong‚ lasting bond with these magnificent creatures.

resident assessment instrument manual

The Resident Assessment Instrument (RAI) Manual provides a comprehensive framework for evaluating the needs of residents in long-term care settings. It ensures standardized assessment methods, promoting accurate care planning and improved outcomes.

1.1 Purpose and Scope of the RAI Manual

The RAI Manual serves as a comprehensive guide for assessing residents’ needs in long-term care settings. Its purpose is to ensure accurate, standardized evaluations, enabling tailored care plans. The scope includes detailed instructions for conducting assessments, coding guidelines, and interpreting data to support informed decision-making and compliance with regulatory requirements.

1.2 Overview of the RAI Assessment Process

The RAI assessment process involves gathering comprehensive data on a resident’s functional, medical, and psychosocial status. It integrates interviews with residents and caregivers, reviews of medical records, and observational data. The process ensures a holistic understanding of each resident’s needs, facilitating personalized care planning and compliance with regulatory standards. It is a systematic approach to enhance care quality and resident outcomes.

Components of the Resident Assessment Instrument (RAI)

The RAI consists of three main components: clinical assessment, functional status evaluation, and caregiver interviews. These elements ensure a comprehensive understanding of a resident’s needs and strengths.

2.1 The Three Components of the RAI

The RAI includes three key components: clinical assessment, functional status evaluation, and caregiver interviews. These elements work together to provide a holistic view of a resident’s health, abilities, and care requirements. The clinical assessment gathers medical information, while the functional evaluation focuses on daily living skills. Caregiver interviews add contextual insights, ensuring comprehensive care planning and accurate documentation for effective support.

2.2 Functional Status and Care Needs Assessment

The RAI evaluates residents’ functional status by assessing their ability to perform daily tasks, focusing on activities of daily living (ADLs) and physical or cognitive limitations. This assessment identifies specific care needs, enabling tailored care plans that address individual requirements, ensuring interventions are targeted and effective to enhance overall well-being and health outcomes.

User Guidance for the RAI Manual

The RAI Manual provides detailed instructions and resources for accurate assessments, ensuring users understand procedures, coding guidelines, and best practices for effective resident care planning.

3.1 Instructions for Completing the RAI Assessments

The RAI Manual provides comprehensive guidelines for conducting assessments, including step-by-step processes to ensure accuracy. It emphasizes the importance of interviewing residents and collecting data systematically. Users are instructed to adhere to CMS standards and coding guidelines to maintain consistency. Detailed instructions are provided for each section, ensuring assessors can gather precise information to support care planning and compliance with regulatory requirements.

3.2 Coding Guidelines and Interpretation

The RAI Manual outlines specific coding guidelines to ensure consistency and accuracy in data interpretation. It provides detailed instructions for assigning codes that reflect resident conditions and care needs. CMS standards emphasize the importance of precise coding to maintain compliance and support effective care planning. Proper interpretation of assessment data is crucial for identifying care priorities and meeting regulatory requirements. Accurate coding ensures reliable outcomes.

The Assessment Process in Detail

The RAI assessment process involves systematic collection and analysis of resident data. It ensures accurate evaluation of functional status, care needs, and health conditions, guiding personalized care plans and compliance with CMS standards.

4.1 Requirements for Conducting RAI Assessments

Conducting RAI assessments requires trained staff, accurate data collection, and adherence to CMS guidelines. Assessments must occur within specific timeframes, ensuring comprehensive evaluation of functional status and care needs. Interdisciplinary teams collaborate to gather detailed information, ensuring compliance with regulatory standards and accurate reporting. The process mandates the use of the latest RAI manual version to maintain consistency and reliability in outcomes, supporting effective care planning and facility compliance.

4.2 Resident Interview and Data Collection

The RAI assessment process involves a structured resident interview to gather accurate information about functional status, care needs, and preferences. Data collection includes observations, medical records, and caregiver input. Standardized tools like the MDS 3.0 ensure consistency. Interviews must follow scripted questions to maintain reliability. Accurate documentation is critical for developing individualized care plans and ensuring compliance with regulatory requirements, fostering person-centered care and improved outcomes.

Updates and Revisions to the RAI Manual

CMS regularly updates the RAI Manual, with Version 1.19.1 introducing new guidelines for care planning and compliance. Updates ensure accurate, standardized assessments, reflecting current care standards.

5.1 Recent Changes in the RAI Manual (Version 1.19.1)

Version 1.19.1 of the RAI Manual includes updated coding guidelines, revised assessment protocols, and new requirements for care planning documentation. These changes aim to enhance accuracy and compliance, ensuring better alignment with current care standards. The updates, effective October 1, 2024, reflect CMS’s commitment to improving resident care and streamlining assessment processes for healthcare providers.

5.2 CMS Updates and Implementation Timelines

CMS has released updates to the RAI Manual, with Version 1.19.1 finalized and effective as of October 1, 2024. The agency delayed the release of Version 1.18 to reduce provider burden. A draft of Version 1.20.1 is now available for review. These updates include new coding guidelines and assessment protocols, with implementation timelines to ensure compliance and smooth transitions for healthcare providers.

Importance of the RAI in Care Planning

The RAI is crucial for creating personalized care plans by identifying residents’ strengths and needs, ensuring tailored interventions and enhanced quality of life.

6.1 Linking Assessment Data to Care Plans

The RAI manual guides care planning by translating assessment data into actionable strategies. It identifies residents’ strengths, needs, and preferences, enabling tailored interventions. CMS guidelines ensure compliance, emphasizing regular updates to care plans based on ongoing assessments; This process ensures personalized, effective care, improving resident outcomes and quality of life in long-term care settings.

6.2 Improving Quality of Care Through RAI

The RAI enhances care quality by enabling tailored interventions based on comprehensive assessments. It identifies specific care needs, fostering better health outcomes. CMS updates and training manuals ensure staff use the tool effectively, promoting consistency and accuracy. This systematic approach improves care coordination, ensuring residents receive appropriate support and interventions, ultimately enhancing their quality of life and well-being.

Training and Resources for RAI Users

The CMS provides training manuals, guides, and online resources to support RAI users. These materials ensure accurate assessments and compliance with updated regulations, enhancing overall proficiency.

7.1 Availability of Training Manuals and Guides

Comprehensive training manuals and guides for the RAI are available on the CMS website. These resources include the MDS 3.0 RAI Users Manual, version 1.19.1, and supplementary materials. The RAI Training Manual and Resource Guide, developed in collaboration with HCFA and HRCA, offers detailed instructions and best practices. These tools are regularly updated to reflect the latest CMS guidelines and are accessible for download, ensuring users stay informed and compliant.

7.2 Online Resources and Support Materials

Extensive online resources and support materials for the RAI are accessible, including the MDS 3.0 RAI Users Manual, version 1.19.1, and associated documents. CMS provides updates, replacement pages, and change tables. Additional tools like the RAI Training Manual and Resource Guide are available, offering practical guidance and examples. These resources are designed to enhance understanding and effective implementation of the RAI assessment process.

Role of CMS in the RAI Manual

CMS oversees the development and updates of the RAI Manual, ensuring compliance with regulations. It provides final versions, like v1.19.1, to guide accurate assessments and care planning.

8.1 CMS Guidelines and Regulations

CMS establishes guidelines for the RAI Manual, ensuring compliance with federal regulations. These guidelines dictate assessment protocols, data submission, and care planning standards. Facilities must adhere to CMS updates, such as version 1.19.1, to maintain certification and reimbursement. CMS also provides timelines for implementation, ensuring smooth transitions for healthcare providers. These regulations aim to enhance care quality and consistency across long-term care facilities.

8.2 Compliance Requirements for Long-Term Care Facilities

Long-term care facilities must comply with CMS regulations tied to the RAI Manual. This includes accurate data submission, timely assessments, and proper documentation. Facilities are required to stay updated on manual revisions, such as version 1.19.1, and implement changes by specified deadlines. Non-compliance can result in penalties or loss of certification, emphasizing the importance of adhering to these standards to ensure quality care and regulatory alignment.

Implementation and Benefits of RAI in Home Care

RAI implementation in home care enhances care coordination and improves resident outcomes by providing standardized assessments, enabling tailored interventions and better management of care needs.

9.1 Improving Care Coordination and Outcomes

The RAI Manual plays a crucial role in enhancing care coordination within home care settings. By providing standardized assessments, it helps identify resident needs, ensuring interventions are tailored to individual requirements. This leads to improved health outcomes, better management of chronic conditions, and enhanced quality of life. The RAI Manual’s structured approach ensures comprehensive data collection, fostering collaboration among care providers and optimizing resource allocation.

9.2 Case Studies and Success Stories

Implementation of the RAI Manual in home care has shown significant benefits. A cluster randomised controlled trial demonstrated improved care coordination and stabilised outcomes for residents. Specific case studies highlight how RAI assessments led to targeted interventions, reducing hospital readmissions by 20% in one agency and improving fall prevention by 15% in another, showcasing its effectiveness in enhancing care quality and resident safety.

Legal and Ethical Considerations

The RAI Manual emphasizes confidentiality and data protection, ensuring ethical use of assessment data. Compliance with regulations is crucial to maintain resident trust and legal standards.

10.1 Confidentiality and Data Protection

The RAI Manual underscores the importance of maintaining resident confidentiality and safeguarding personal data. Facilities must adhere to strict data protection protocols, ensuring secure storage and access controls. Compliance with HIPAA regulations and CMS guidelines is essential to prevent unauthorized disclosure and misuse of sensitive information, protecting residents’ privacy and upholding ethical standards in care settings.

10.2 Ethical Use of Assessment Data

The ethical use of RAI assessment data is critical to ensure transparency, fairness, and respect for resident autonomy. Facilities must collect data accurately, avoid bias, and use it solely for care planning and compliance with CMS guidelines. Ethical practices include obtaining informed consent, respecting confidentiality, and ensuring data integrity to uphold trust and accountability in the care process.

Future Directions and Innovations

The RAI Manual is evolving with technological advancements, including integration with electronic health records and AI-driven tools for predictive analytics, enhancing care planning efficiency and accuracy.

11.1 Emerging Trends in Resident Assessment

Emerging trends in resident assessment include the integration of electronic health records (EHRs) and AI-driven tools for predictive analytics. These innovations enhance accuracy and efficiency in care planning, enabling better identification of resident needs. Updates to the RAI Manual, such as version 1.19.1, reflect these advancements, ensuring alignment with modern healthcare standards and improving interoperability across care settings.

11.2 Technology Integration in RAI Processes

Technology integration is transforming RAI processes through electronic health records (EHRs) and AI-driven tools. Automated systems enhance data accuracy and streamline assessments, while predictive analytics improve care planning. Tools like the TC20 automated cell counter exemplify how technology optimizes efficiency. These advancements, reflected in updates like RAI Manual version 1.19.1, enable better care coordination and reduce manual errors, aligning with modern healthcare demands.

kenmore sewing machine mini ultra manual

The Kenmore Mini Ultra Manual provides essential instructions for operating and maintaining your sewing machine. It covers threading, bobbin winding, tension adjustments, and decorative stitch functions, ensuring optimal performance.

Overview and Importance of the Manual

The Kenmore Mini Ultra Sewing Machine Manual is a comprehensive guide designed to help users understand and utilize their sewing machine effectively. It provides detailed instructions for setting up, operating, and maintaining the machine, ensuring optimal performance. The manual covers essential tasks such as threading, bobbin winding, and adjusting thread tension. Additionally, it offers insights into advanced features like decorative stitches and zigzag functions. This resource is crucial for both beginners and experienced sewists, as it simplifies complex processes and enhances creativity. By following the manual, users can troubleshoot common issues, extend the machine’s lifespan, and achieve professional-quality results. Its clear, step-by-step instructions make it an indispensable tool for anyone looking to unlock the full potential of their Kenmore Mini Ultra sewing machine. Regular reference to the manual ensures safe and efficient operation, making it a vital companion for all sewing projects.

Key Features of the Kenmore Mini Ultra Sewing Machine

The Kenmore Mini Ultra Sewing Machine is equipped with a range of features that make it versatile and user-friendly. It includes a variety of decorative stitches and a zigzag function, allowing for creativity in sewing projects. The machine also has a full rotary mechanism, ensuring smooth and efficient stitching. Its compact design makes it portable and ideal for small spaces. The manual highlights the machine’s ability to handle different fabrics and its adjustable thread tension, which ensures even stitching. Additionally, the Mini Ultra model is known for its durability and ease of use, making it suitable for both beginners and experienced sewists. These features collectively enhance the sewing experience, providing precision and versatility for various projects, from basic repairs to intricate designs.

Understanding the Kenmore Mini Ultra Sewing Machine Manual

The Kenmore Mini Ultra Manual serves as a comprehensive guide, detailing step-by-step instructions for threading, bobbin winding, and tension adjustments. It also provides troubleshooting tips for optimal performance.

Threading the Machine

Threading the Kenmore Mini Ultra sewing machine is a straightforward process when followed carefully. The manual provides step-by-step guidance to ensure proper thread placement. Begin by positioning the spool on the spool pin and drawing the thread through the tension discs. Guide the thread through the take-up lever and then through the needle’s eye, leaving a small loop for easy sewing. The manual emphasizes using high-quality thread to prevent tangling or breakage. It also advises avoiding old or damaged thread, as this can affect stitch quality. Proper threading ensures smooth operation and consistent stitching. If issues arise, the manual recommends checking thread alignment and tension. Always refer to the manual for troubleshooting common threading mistakes and maintaining optimal performance; This section is crucial for users to master before proceeding with sewing projects.

Bobbin Winding and Thread Tension Adjustment

Winding the bobbin and adjusting thread tension are critical steps for optimal sewing performance. The Kenmore Mini Ultra manual guides users through these processes. To wind the bobbin, place it on the bobbin winder, draw thread from the spool, and gently wind until full. Ensure the thread is evenly distributed and not overfilled. After winding, insert the bobbin into the machine, following the manual’s alignment instructions. Thread tension adjustment is next, achieved by turning the tension knob until the thread flows smoothly without slack or resistance. Proper tension prevents uneven stitches or fabric bunching. The manual advises testing tension on scrap fabric before sewing. Incorrect tension can lead to common issues like loose stitches or thread breakage. By following these steps, users can achieve balanced stitching and extend the machine’s lifespan. This section is essential for mastering the basics of machine setup.

Decorative Stitches and Zigzag Function

The Kenmore Mini Ultra sewing machine offers a variety of decorative stitches and a versatile zigzag function, enabling users to enhance their sewing projects creatively. The manual provides detailed instructions on selecting and using these features. Decorative stitches add aesthetic appeal to fabrics, while the zigzag function is ideal for finishing seams or sewing stretchy materials. Users can adjust stitch length and width to customize their work. The manual also covers how to properly thread the machine and set up the bobbin for decorative stitching. With clear guidance, users can explore various stitching options, ensuring professional-looking results. This feature is particularly useful for crafters and sewists looking to add unique touches to their creations. By mastering these functions, users can unlock new creative possibilities and take their sewing skills to the next level. The manual ensures ease of use, making it accessible for both beginners and experienced sewists.

Operating the Kenmore Mini Ultra Sewing Machine

Mastering the Kenmore Mini Ultra involves threading the machine, winding the bobbin, and adjusting thread tension. The manual guides users through these steps and decorative stitch functions.

Step-by-Step Guide to Threading and Bobbin Setup

The Kenmore Mini Ultra Manual provides a detailed guide for threading and bobbin setup. Start by pulling the handwheel to disengage the needle mechanism. Next, draw thread from the spool and guide it through the machine’s tension discs and take-up lever. Wind the bobbin by pulling thread from the spool, wrapping it around the bobbin, and securing it. Insert the bobbin into the bobbin case, ensuring the thread exits correctly. Finally, thread the machine’s needle and adjust the tension for optimal sewing performance. Proper threading and bobbin setup are essential for smooth operation and consistent stitching.

Adjusting Thread Tension for Optimal Sewing

Proper thread tension is crucial for achieving professional results with your Kenmore Mini Ultra sewing machine. To adjust the thread tension, start by locating the tension dials on the machine, typically found on the front or side. Turn the dials clockwise to increase tension or counterclockwise to decrease it. Always test the tension by sewing a few stitches on a scrap piece of fabric. If the stitches are too loose, tighten the upper thread tension. If the fabric puckers, reduce the lower thread tension. The manual recommends balancing the tension to ensure even stitching. For decorative stitches or zigzag functions, slight adjustments may be needed for optimal performance. Regularly checking and adjusting thread tension will prevent uneven seams and extend the machine’s lifespan. Follow the manual’s guidelines for specific tension settings based on fabric type and stitch selection.

Using Decorative Stitches and Zigzag Function

The Kenmore Mini Ultra sewing machine offers a variety of decorative stitches and a versatile zigzag function to enhance your sewing projects. To access these features, simply rotate the stitch selection dial to choose from pre-programmed decorative patterns. The zigzag function is ideal for finishing seams, preventing fraying, or adding a decorative edge to fabric. For decorative stitches, adjust the stitch length and width using the control dials to achieve the desired effect. The manual provides detailed diagrams and guidelines for each stitch type, ensuring precise results. Experiment with different fabrics and tensions to optimize stitch quality. The machine’s user-friendly interface makes it easy to explore creative possibilities, from intricate embroidery patterns to functional zigzag stitching. Regular practice with these features will unlock the full potential of your Kenmore Mini Ultra sewing machine.

Maintenance and Troubleshooting

Regular maintenance involves cleaning and oiling the machine to ensure smooth operation. Common issues like thread tension problems can be resolved by adjusting settings or rethreading the machine.

Cleaning and Oiling the Machine

Cleaning and oiling are crucial for maintaining the Kenmore Mini Ultra sewing machine. Regularly remove lint and debris from the bobbin area and tension discs using a soft brush. Turn off the machine and unplug it before cleaning. Apply a few drops of sewing machine oil to the metal parts, such as the bobbin hook and handwheel shaft, to ensure smooth operation. Avoid over-oiling, as it can attract dust and cause mechanical issues. For detailed steps, refer to the manual or manufacturer’s guidelines. Proper maintenance extends the machine’s lifespan and prevents common problems like jamming or noisy operation.

Common Issues and Solutions

Common issues with the Kenmore Mini Ultra sewing machine include thread bunching, uneven stitches, and jamming. These problems often result from incorrect threading, improper tension settings, or lack of regular maintenance. To resolve thread bunching, rethread the machine and ensure the bobbin is correctly seated. For uneven stitches, adjust the tension dials according to the manual’s guidelines. If the machine jams, turn it off, unplug it, and gently remove any tangled threads. Regular cleaning and oiling can prevent many of these issues. Refer to the troubleshooting section for specific solutions, and consult the manual for detailed instructions. Addressing these issues promptly ensures smooth operation and extends the machine’s longevity.

Resources and Support

Download the Kenmore Mini Ultra manual from Sears Parts Direct or Kenmore’s official website. Additional resources include repair guides, troubleshooting tips, and customer support for assistance with your machine.

Downloading the Kenmore Mini Ultra Manual

To access the Kenmore Mini Ultra sewing machine manual, visit Sears Parts Direct or Kenmore’s official website. Enter your model number, which typically starts with 385, to find the correct manual. The manual is available for download in PDF format, making it easy to view on any device or print for convenience. It includes detailed instructions for threading the machine, winding the bobbin, adjusting thread tension, and using decorative stitches. Additionally, the manual covers maintenance tips, such as cleaning and oiling, to ensure optimal performance. For troubleshooting, the manual provides common issues and solutions. Sears Parts Direct also offers part diagrams and repair guides for further assistance. Downloading the manual ensures you have all the information needed to operate and maintain your Kenmore Mini Ultra sewing machine effectively.

Additional Resources for Repair and Maintenance

Beyond the Kenmore Mini Ultra manual, additional resources are available to support repair and maintenance. Sears Parts Direct offers a comprehensive selection of parts and diagrams specific to your model, aiding in precise repairs. Kenmore’s official website provides access to service manuals and troubleshooting guides. For hands-on assistance, consider consulting sewing machine repair forums or professional technicians who specialize in Kenmore models. Online marketplaces like Amazon or eBay may also have printed copies of the manual or compatible parts. Furthermore, YouTube tutorials and sewing communities often share tips and solutions for common issues. By utilizing these resources, you can extend the life of your Kenmore Mini Ultra and maintain its performance. Regular maintenance, as outlined in the manual, combined with these resources, ensures your machine continues to function smoothly over time.

user manual 1999 fleetwood avion 5th wheel

The 1999 Fleetwood Avion 5th Wheel is a classic model known for its luxury‚ reliability‚ and spacious interior design‚ making it a popular choice for RV enthusiasts.

1.1 Overview of the Fleetwood Avion Model

The Fleetwood Avion model is renowned for its elegant design and durability‚ offering a spacious interior with modern amenities. Built for comfort‚ it features a well-equipped kitchen‚ cozy sleeping quarters‚ and ample storage. This 5th wheel is ideal for families and adventure seekers‚ combining practicality with luxury. Its reputation as a reliable RV has made it a favorite among travelers.

1.2 Key Features and Specifications

The 1999 Fleetwood Avion 5th Wheel features a sturdy construction with durable materials‚ offering various floorplans to suit different needs. It includes a fully equipped kitchen‚ comfortable sleeping areas‚ and modern bathroom amenities. The model is known for its spacious interior‚ ample storage‚ and reliable performance. Specifications vary by model‚ but it consistently delivers a blend of comfort and functionality for travelers.

Pre-Purchase Considerations

Researching the 1999 Fleetwood Avion’s history‚ checking for any recalls‚ and assessing its condition are crucial before purchase to ensure reliability and value for your investment.

2.1 Understanding the Model Year 1999

The 1999 Fleetwood Avion 5th Wheel represents a blend of classic design and practical features‚ with improvements from previous years‚ including enhanced interior amenities and durability updates‚ ensuring a comfortable and reliable RV experience.

2.2 Researching the Vehicle’s History

Researching the history of a 1999 Fleetwood Avion 5th Wheel involves reviewing maintenance records‚ ownership history‚ and any potential recalls. Use the VIN to check for accidents or major repairs. Understanding the vehicle’s past ensures reliability and helps identify potential issues before purchase‚ ensuring a safer and more informed buying decision.

Essential Components and Features

The 1999 Fleetwood Avion 5th Wheel features a well-equipped interior with modern amenities‚ durable construction‚ and essential systems for comfortable living‚ ensuring reliability and long-lasting performance.

3.1 Interior Layout and Amenities

The 1999 Fleetwood Avion 5th Wheel features a spacious interior designed for comfort and functionality. The layout includes a full kitchen‚ bathroom‚ and sleeping quarters‚ with durable materials and finishes. Amenities such as a refrigerator‚ stove‚ and cabinetry provide convenient living. The interior is well-appointed with comfortable furnishings and ample storage‚ making it ideal for extended travel or seasonal use.

3.2 Exterior Design and Build Quality

The 1999 Fleetwood Avion 5th Wheel boasts a robust exterior design with durable materials‚ ensuring long-lasting performance. Its aerodynamic profile enhances towing efficiency‚ while the sturdy construction withstands various weather conditions. The exterior finish is both stylish and resilient‚ featuring aluminum siding and a reinforced roof for added protection. This model is built to endure‚ offering reliability and safety for years of adventure.

Maintenance and Upkeep

Regular checks of seals‚ batteries‚ and tires are essential. Cleaning and inspecting the exterior and interior ensures longevity. Proper upkeep prevents wear and extends the RV’s lifespan.

4.1 Schedule and Tips for Regular Maintenance

For the 1999 Fleetwood Avion‚ schedule monthly checks of tire pressure‚ brakes‚ and fluid levels. Seasonally‚ inspect roof seals and reapply protective coatings. Annually‚ service the HVAC system and water heater. Keep a maintenance log to track completed tasks and plan future upkeep. Regular cleaning of interior surfaces prevents mold and mildew buildup.

4.2 Common Wear and Tear Issues

Common issues with the 1999 Fleetwood Avion include roof leaks due to seal degradation and floor damage from water intrusion. Electrical systems may corrode over time‚ and exterior paint may fade. Regular inspections can help identify these problems early; Addressing them promptly prevents further damage and ensures longevity of the vehicle.

Towing and Setup

Towing and setup for the 1999 Fleetwood Avion require careful planning and proper equipment to ensure safety and stability on the road. Regular checks and maintenance are essential.

5.1 Hitch Systems and Compatibility

The 1999 Fleetwood Avion 5th Wheel requires a compatible hitch system to ensure safe towing. A 5th wheel hitch is recommended due to its stability and weight distribution. Ensure the hitch is rated for the trailer’s weight and properly installed. Compatibility with your tow vehicle’s frame is crucial for secure coupling and smooth towing performance on the road.

5.2 Proper Weight Distribution and Safety

Proper weight distribution is critical for safe towing. Use a weight distribution hitch to evenly distribute the trailer’s weight across the tow vehicle’s axles. Ensure the trailer is balanced‚ with heavier items placed near the front. Regularly inspect the hitch‚ tires‚ and brakes for wear. Always adhere to the manufacturer’s weight ratings and conduct pre-trip safety checks to ensure secure and stable towing conditions.

Troubleshooting Common Issues

This section covers diagnosing and resolving common problems‚ such as electrical malfunctions‚ plumbing leaks‚ and appliance failures‚ ensuring your Avion 5th Wheel operates smoothly and safely.

6.1 Electrical and Plumbing Systems

Identify and address issues like short circuits‚ blown fuses‚ or water leaks. Check circuit breakers‚ GFCI outlets‚ and plumbing connections. Inspect for corrosion or damage. Regularly test water pressure and electrical continuity. Ensure proper winterization to prevent freezing. Use RV-specific products for safe repairs. Consult a professional if problems persist or worsen over time to maintain system integrity and functionality.

6.2 Addressing Leaks and Structural Integrity

Inspect the roof‚ windows‚ and seams for signs of leaks. Address water damage promptly to prevent structural weakening. Check for delamination or soft spots in floors and walls. Ensure the frame is secure and free from rust. Regularly apply sealants to vulnerable areas. For severe issues‚ consult a professional to maintain the RV’s stability and safety over time.

Interior and Exterior Care

Regularly clean interior surfaces with mild detergents and condition upholstery. Exteriors require frequent washing and waxing to protect finishes. Seasonal checks ensure year-round durability and appearance.

7.1 Cleaning and Protecting Surfaces

For interior surfaces‚ use mild detergents and microfiber cloths to avoid scratching. Exterior surfaces should be cleaned with non-abrasive cleaners and protected with UV-resistant waxes. Avoid harsh chemicals and regularly inspect for damage to maintain longevity and preserve the 1999 Fleetwood Avion 5th Wheel’s appearance and durability.

7.2 Seasonal Preparation and Storage

Seasonal preparation involves winterizing plumbing‚ cleaning‚ and covering the RV to protect from elements. Inspect for repairs and secure all components. Proper storage preserves the Fleetwood Avion’s condition‚ ensuring longevity and readiness for future use. Regular checks during storage are essential to maintain its integrity and functionality when not in use.

Upgrading and Customization

Upgrading the 1999 Fleetwood Avion 5th Wheel can enhance its functionality and comfort. Modernizing appliances‚ installing new tech‚ and customizing interiors are popular choices for owners seeking a refreshed experience.

8.1 Modernizing Appliances and Technology

Modernizing the 1999 Fleetwood Avion 5th Wheel involves upgrading to energy-efficient appliances and smart technology. Replacing outdated systems with LED lighting‚ solar panels‚ and advanced HVAC units improves functionality and reduces energy consumption. Additionally‚ integrating modern entertainment systems and Wi-Fi connectivity enhances comfort and convenience for a contemporary camping experience.

8.2 DIY Projects for Enhanced Functionality

Enhance your 1999 Fleetwood Avion 5th Wheel with DIY projects like adding custom storage solutions‚ upgrading lighting‚ or installing organizational systems. Simple modifications‚ such as updating cabinetry or incorporating multi-functional furniture‚ can maximize space and improve livability. These projects are cost-effective and tailored to personal preferences‚ ensuring a more comfortable and efficient RV experience.

Safety and Emergency Procedures

Ensure fire extinguishers are accessible‚ with clear emergency exit routes and a first aid kit. Regularly inspect systems to prevent hazards and ensure safety compliance.

9.1 Fire Safety and Emergency Exits

Install smoke detectors and ensure fire extinguishers are fully charged. Clearly mark emergency exits for quick access. Regular inspections prevent hazards‚ ensuring compliance with safety standards and safeguarding occupants.

9.2 First Aid and Emergency Kit Essentials

A well-stocked emergency kit should include bandages‚ antiseptics‚ gloves‚ and a first aid manual. Add flashlights‚ batteries‚ and a multi-tool for versatility. Regularly check expiration dates and replenish supplies to ensure readiness for unexpected situations while on the road or at campgrounds.

Warranty and Customer Support

Fleetwood offers detailed warranty information and dedicated customer support for the 1999 Avion 5th Wheel‚ ensuring owners have access to assistance and resources for maintenance and repairs.

10.1 Understanding the Manufacturer’s Warranty

The 1999 Fleetwood Avion 5th Wheel comes with a manufacturer’s warranty covering parts and labor for a specified period. It includes protection against defects in materials and workmanship‚ providing peace of mind for owners. The warranty terms outline what is covered‚ duration‚ and any conditions that may void the coverage‚ ensuring clarity and transparency for users.

10.2 Contacting Fleetwood for Assistance

For inquiries or support‚ owners can contact Fleetwood directly through their official website‚ phone‚ or email. The customer service team is available to address questions‚ provide troubleshooting guidance‚ and assist with warranty-related matters.

Additionally‚ owners can access online resources‚ FAQs‚ and downloadable manuals for the 1999 Fleetwood Avion 5th Wheel‚ ensuring comprehensive support for maintenance and repairs. Always have your vehicle identification number ready for efficient assistance.

The 1999 Fleetwood Avion 5th Wheel is a reliable and appealing RV for both seasoned and new adventurers‚ offering comfort and durability with proper care and maintenance.

11.1 Summary of Key Points

The 1999 Fleetwood Avion 5th Wheel offers a blend of comfort‚ space‚ and durability. Its interior features modern amenities‚ while the exterior showcases robust construction. Regular maintenance is crucial for longevity‚ ensuring electrical and plumbing systems function optimally. Proper towing and setup‚ along with seasonal care‚ enhance safety and performance. This model remains a top choice for RV enthusiasts seeking reliability and value. Always adhere to manufacturer guidelines for optimal experience and longevity of your Fleetwood Avion.

11.2 Importance of Proper Maintenance and Care

Regular maintenance is vital to extend the life of your 1999 Fleetwood Avion 5th Wheel. Addressing wear and tear promptly prevents costly repairs. Inspecting electrical and plumbing systems ensures functionality and safety. Protecting exterior surfaces from weather damage maintains its appearance. Proper care enhances performance‚ safety‚ and comfort‚ ensuring your Avion remains a reliable and enjoyable home on wheels for years to come.